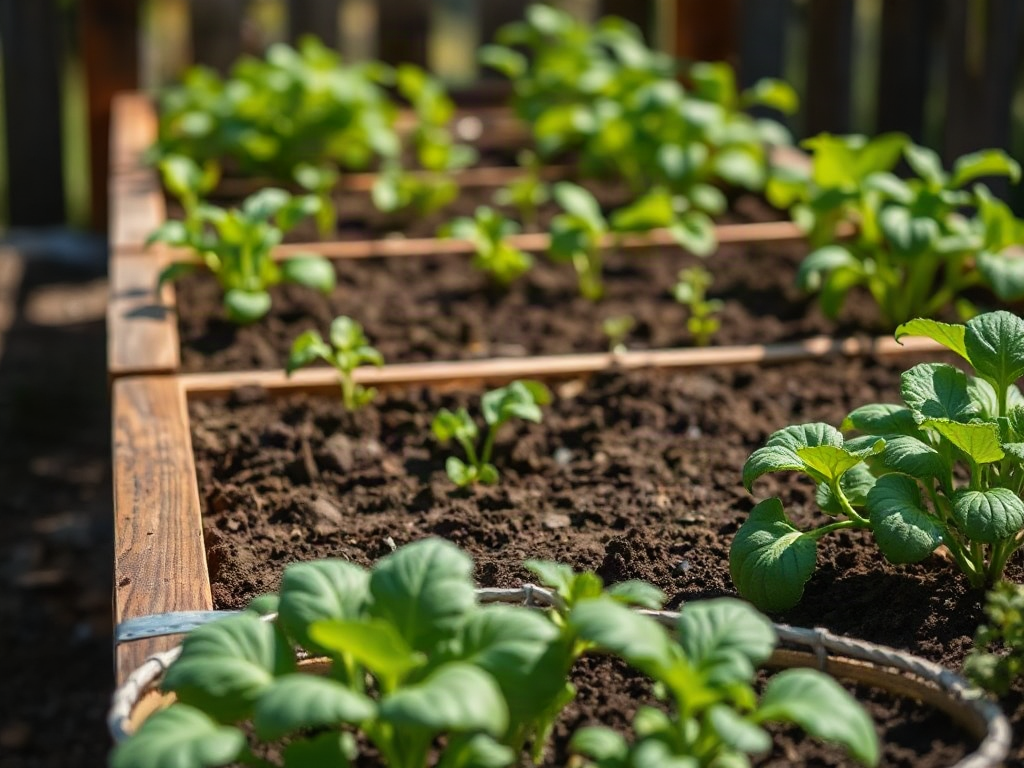
Raised bed gardening for beginners with limited space works best with one narrow bed placed in strong sunlight, filled with a well-draining soil blend, and planted with compact crops that earn their footprint. Keep the bed no wider than you can reach across without stepping on the soil, provide at least 8 to 12 inches of growing depth for most vegetables, and secure drainage before filling it. Match plant spacing to mature size rather than seedling size, using trellises for peas, cucumbers, and compact tomatoes. Consistent watering and staged sowing will produce more useful harvests than overcrowding the bed with too many varieties.
Choose a Bed That Fits the Site and Your Reach
A productive raised bed begins with the site, not the lumber, metal, or kit used to contain it. Most fruiting vegetables need a location receiving at least six hours of direct sun during the growing season, while leafy greens can remain useful with somewhat less. Observe the proposed area in the morning, at midday, and late afternoon. A wall, balcony railing, fence, or neighboring building may cast a shadow that was not obvious during a single inspection.
Limited-space gardeners should favor reach over maximum bed width. A bed accessible from both long sides can be about 3 to 4 feet wide, depending on the gardener’s reach. If it sits against a wall or fence, keep it closer to 2 feet wide. Soil should never require stepping into the bed because foot pressure collapses pore spaces, restricts drainage, and makes roots work through denser ground. A long, narrow bed is therefore often more practical than a compact square with an unreachable center.
Leave enough clearance to water, weed, and carry a bucket around the bed. A narrow passage may appear efficient on paper but becomes frustrating once leaves spill over the edges. Allow roughly 2 feet for occasional access and more if a wheelbarrow, mobility aid, or kneeling space is needed. Before committing to a permanent structure, mark the bed and path with string or removable tape. Reach toward the center from every working side while holding a small watering can; this quick test exposes awkward corners.
Material choice is secondary to sound construction. Untreated, rot-resistant wood is easy to modify but eventually deteriorates. Galvanized metal lasts longer and warms quickly in sunlight, although its edges and heat exposure need consideration. Masonry is durable but occupies more floor area and is difficult to move. Avoid salvaged material with unknown coatings or chemical exposure when it will contact food-growing soil.
A beginner working on a patio or rooftop must also consider loaded weight and drainage discharge. Wet soil is heavy, and elevated structures may have load limits that require confirmation from the property owner or a qualified building professional. Water escaping from the bed must not stain walls, damage flooring, or drain onto a neighbor’s space. For renters, fabric grow bags or smaller containers may be safer than a permanent framed bed. The bed is succeeding at this stage if every part is reachable, water has a harmless exit, and the selected location remains sunny through the main growing months.
Build the Right Soil Depth and Drainage
Raised-bed soil must hold moisture while retaining enough air for roots. Ordinary yard soil placed inside a frame often compacts into a dense mass, particularly when it contains clay. Potting mix alone may drain well but can be expensive and may settle substantially. A practical fill combines screened topsoil or mineral soil with mature compost and a light, stable component sold for raised beds or outdoor containers. The finished blend should feel crumbly when moist rather than sticky, dusty, or springy with undecomposed wood.
Most shallow-rooted greens, radishes, bush beans, and many herbs can grow in 8 to 12 inches of usable soil. Tomatoes, peppers, cucumbers, and root crops perform more reliably with 12 to 18 inches, especially when the bed sits over concrete. A bottomless bed over healthy, uncontaminated ground lets roots travel below the frame, so the wooden or metal sides do not need to represent the full rooting depth. Over paving, the bed functions more like a large container and needs both adequate depth and unobstructed drainage holes.
Do not line the bottom with rocks in an attempt to improve drainage. A coarse layer beneath finer soil does not substitute for drainage openings and reduces the volume available to roots. On soil, remove perennial weeds and loosen the surface before filling the frame. Plain cardboard can temporarily suppress existing grass, but thick overlapping layers may slow water movement until they break down. On hard surfaces, use the manufacturer’s base or a durable permeable barrier that retains soil without sealing the outlet.
Fill the bed close to the top, water it thoroughly, and expect some settling. Add more of the same blend if the surface drops sharply; do not repeatedly bury plants under fresh material. Compost is valuable organic matter, but an all-compost bed can shrink quickly, hold nutrients unevenly, or remain too wet. Likewise, filling the lower half with logs, branches, or fresh yard waste saves purchased soil initially but creates settling pockets and unpredictable moisture in a small beginner bed. Stable fill is usually worth the higher upfront cost where every square foot must perform.
Before planting, run a simple drainage check. Saturate the bed evenly, then inspect it after excess water has had time to escape. Persistent puddles, a sour odor, or soil that stays slick and airless signals blocked outlets or an overly fine blend. Water that races straight through while the center remains dry points to a water-repellent or overly coarse mix. Readers comparing soil options for Raised bed gardening for beginners with limited space should prioritize consistent texture and known ingredients over decorative bag labels.
Plan Crops Around Space, Sun, and Harvest Value
A small bed should be planned by mature plant size and usable harvest, not by how many seedlings fit on planting day. One sprawling squash can occupy the area that might otherwise hold several rounds of lettuce, radishes, scallions, and herbs. That does not make squash a wrong choice, but it is a poor trade when floor space is scarce and the vine cannot be directed safely beyond the bed.
Begin with crops the household regularly eats, then screen them for compact growth and harvest pattern. Cut-and-come-again lettuce, chard, parsley, basil, bush beans, radishes, and scallions provide repeated or quick harvests from modest areas. Peas and cucumbers can use vertical space when supported by a secure trellis. Choose varieties described as bush, patio, dwarf, or compact, but still verify their expected spread; marketing terms do not make every plant suitable for every bed.
Place a trellis on the side least likely to shade shorter crops. In the Northern Hemisphere, that is commonly the north side, although nearby walls and the sun’s seasonal angle may change the result. Tie the support to the bed or another stable anchor before vines become heavy. A freestanding trellis pushed into loose soil can topple during wind or pull roots when adjusted late in the season.
Use seed-packet spacing as a starting point, giving each plant its final recommended distance rather than preserving every seedling. Intensive spacing can cover exposed soil and reduce evaporation, but excessive crowding blocks airflow and creates competition for water and light. Leaves that remain wet, pale lower growth, weak stems leaning outward, or plants producing foliage with little harvest can indicate that the plan is too dense.
A compact first planting might pair a trellised cucumber at the rear with a short row of bush beans, several lettuces, and radishes along the front edge. Harvest the radishes before the lettuce expands, then replace them with scallions or another short crop suited to the weather. Keep aggressive spreaders such as mint in a separate pot, even if the pot sits beside the bed. Deep shade beneath a tomato or cucumber should not be treated as free growing space; it may suit parsley in mild conditions, but sun-loving herbs will become thin and unproductive.
Sketch the bed as a grid and record sowing dates rather than relying on memory. The crop plan for Raised bed gardening for beginners with limited space is working when plants reach normal form without constant pruning, the center remains accessible, and harvested gaps can be replanted. If foliage closes every path to the soil within a few weeks, remove the weakest plant rather than allowing the entire bed to struggle.
Manage Watering, Feeding, and Repeat Planting
Small raised beds change moisture faster than in-ground plots because more soil is exposed to warm air and the root zone is relatively confined. Water deeply enough to moisten the active root area, then wait until the upper inch begins to dry before watering again. A rigid daily schedule ignores rainfall, temperature, plant size, and soil texture. Check moisture with a finger several inches below the surface or use a small trowel to see whether the interior is damp.
Apply water slowly at soil level. A watering wand works for one bed, while a dripline or soaker hose can reduce daily labor if it distributes water evenly. After installation, dig two or three small inspection holes to confirm that moisture reaches the middle and far end; visible wetness at the surface does not prove that the root zone is hydrated. Containers beneath roof overhangs need deliberate watering even after rain, while exposed beds may need protection from prolonged saturation.
A 1- to 2-inch layer of clean straw, shredded leaves, or another appropriate organic mulch can slow evaporation once seedlings are established. Keep mulch away from stems and check beneath it before adding water. Thick mulch over wet soil can conceal slugs and delay drying. Wilting at midday is not automatically drought: plants may droop temporarily during intense heat even when the soil is moist. Wilting that persists into the cooler evening, paired with dry subsurface soil, is a more useful warning.
Feeding should respond to the soil blend and crop, not a belief that raised beds require constant fertilizer. Compost contributes organic matter and some nutrients, but repeated harvesting removes nutrients over time. Follow the labeled rate for a fertilizer intended for edible gardens if growth becomes pale or weak and other causes, including shade and waterlogging, have been ruled out. Excess nitrogen can produce large tomato or cucumber vines with delayed flowering, and concentrated fertilizer can injure roots.
A compact operating routine keeps the bed productive:
- Inspect twice weekly: Check moisture below the surface, leaf color, pests, and blocked drainage.
- Harvest promptly: Pick beans, greens, and herbs while usable so plants continue producing and space does not go to waste.
- Replant open areas: Sow a small amount every one to three weeks where the crop and season permit, rather than planting every seed at once.
- Refresh between crops: Remove roots and debris, loosen only the planting area, and add a modest layer of finished compost if the surface has settled.
Track what happens after each adjustment. Even moisture, steady new growth, normal leaf color, and flowers developing into fruit indicate that the system is balanced. Repeated crusting, runoff over the sides, mushrooms combined with soggy soil, or lower leaves yellowing across several plants calls for closer drainage and irrigation checks. A simple dated notebook makes Raised bed gardening for beginners with limited space easier to refine because planting intervals, weather, and crop performance remain visible.
Frequently Asked Questions
What is the best raised bed size for a beginner?
A bed about 3 to 4 feet wide is manageable when accessible from both sides; against a wall, limit width to roughly 2 feet. Length can match the site as long as every planting area remains reachable.
How deep should a small raised bed be?
Use 8 to 12 inches of soil for greens, radishes, and many herbs, and consider 12 to 18 inches for tomatoes, cucumbers, peppers, and root crops, especially over paving.
Can a raised bed be placed on concrete?
Yes, if the bed has sufficient soil depth, unrestricted drainage, and a base that retains soil. Confirm that runoff is acceptable and that the surface can safely support the wet bed's weight.
How often should a raised bed be watered?
Water when the upper inch begins to dry rather than following a fixed calendar. Check several locations because edges and areas near large plants can dry faster than the center.
Which vegetables should not share a very small bed?
Avoid combining several sprawling or heavily shading plants, such as full-size squash, indeterminate tomatoes, and unsupported cucumbers. Choose one dominant crop and fill remaining sunny areas with compact, quick-growing vegetables.
Further Reading
Authoritative Sources
- Raised Bed Gardens
extension.umn.eduUniversity of Minnesota Extension explains site preparation, bed construction, soil, and maintenance for raised vegetable beds
- Raised Bed Gardening
extension.oregonstate.eduOregon State University Extension provides practical direction on dimensions, materials, soil preparation, and irrigation
- USDA Plant Hardiness Zone Map
planthardiness.ars.usda.govThe official zone map helps gardeners assess winter hardiness when selecting perennial herbs and other plants
- Safe Pest Control
epa.govEPA guidance offers a safety-focused reference for identifying and managing garden pests responsibly
Conclusion
A first raised bed should be small enough to manage well rather than large enough to hold every desired crop. Confirm sunlight, reach, structural weight, and drainage before buying materials. Fill the bed with a stable, well-aerated soil blend, then select compact vegetables according to their mature spread and seasonal value. Vertical supports can expand usable growing space, but only when they are secure and positioned to limit shade.
After planting, let subsurface moisture and plant condition determine irrigation. Record sowing dates, harvest promptly, and refill openings with weather-appropriate crops instead of overcrowding the original layout. If growth declines, examine light, drainage, root moisture, and spacing before reaching for fertilizer. Those observations will show whether the next useful change is a different crop, a revised watering pattern, or simply fewer plants.