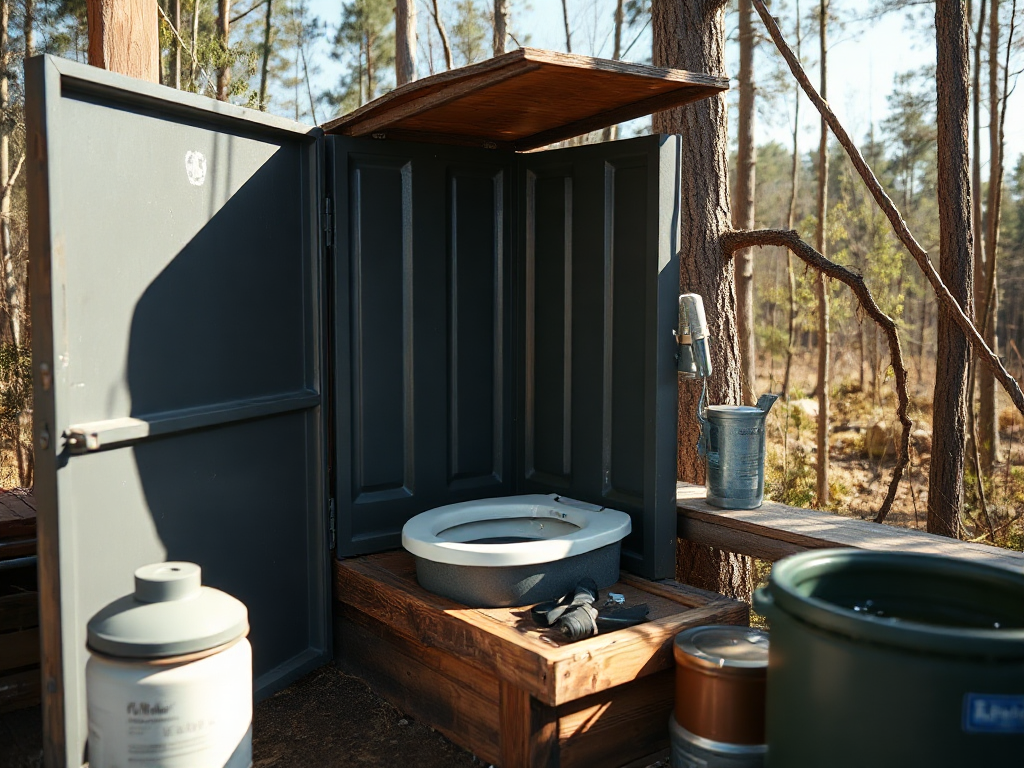
Composting toilet maintenance prevents off-grid sanitation failures by controlling moisture, preserving airflow, separating liquids, and removing finished material before the chamber reaches capacity. Inspect the urine-diversion path, fan, vent, seals, and solids level on a regular schedule, then correct wet bedding, blocked ventilation, leaks, or poor separation before odors and surface buildup develop. Use only the bulking material and cleaning products approved for the toilet model, because excess water and harsh chemicals can disrupt decomposition or damage components. A maintenance log tied to occupancy and seasonal use makes service timing more reliable than waiting for odor, insects, or overflow.
The Failure Points That Maintenance Must Control
Composting toilets depend on a small set of conditions that must remain stable: solids need enough air, moisture must stay within the unit’s operating range, liquids must leave through the intended route, and the chamber must not be allowed to overfill. Maintenance is therefore less about adding a product and more about protecting the system’s airflow, drainage, and capacity. A toilet that looks clean can still be approaching failure if a vent fan is weakening or the urine-diversion outlet is slowly restricted.
Moisture is often the first pressure point. Excess liquid can come from poor separation, a blocked drain, wet cleaning, condensation, or unusually heavy use. When solids remain saturated, aerobic activity may slow and anaerobic odors can become noticeable. Very dry material creates a different problem: waste may clump, remain exposed, and resist the mixing or agitation designed into the unit. The correct response depends on the model, so the owner’s manual should take priority over generic advice.
Airflow deserves a physical inspection rather than an assumption. Check that the vent pipe has no obvious obstruction, the fan is operating when required, exterior screens are clear, and pipe joints have not separated. In a cold climate, condensation can collect in a vent line and restrict movement of air; in a hot, humid climate, insects and dust may affect screens or fan performance. A low-power fan may be appropriate for an autonomous electrical system, but a failed fan can turn a normally quiet toilet into a sanitation problem within a short period of heavy use.
Liquid separation also has consequences beyond odor. A kinked hose, crusted fitting, frozen section, or poorly supported drain can cause liquid to back up into the solids area or leak onto surrounding materials. Look for unexplained dampness, salt-like deposits, staining, or a change in drainage speed. Do not treat repeated blockage as a nuisance to clear indefinitely; it may indicate an incorrect slope, an unsuitable hose size, or a collection arrangement that needs redesign.
A common mistake is to use household disinfectant, bleach, or large amounts of water because the bowl appears soiled. Those products may harm seals, fan components, or the biological conditions inside the chamber, depending on the design. Wipe surfaces with the cleaner specified by the manufacturer and use as little liquid as will remove the contamination. Routine inspection of ventilation and liquid routing usually prevents a more disruptive repair later.
A Maintenance Schedule for Different Use Patterns
Maintenance frequency should follow occupancy, temperature, and the type of toilet rather than a calendar copied from another installation. A weekend cabin used by two people needs a different routine from a full-time household or a property that hosts guests. The useful principle is to inspect the components that can fail silently and service the components whose condition changes visibly.
Before regular use, confirm that the unit is level, the vent path is open, the fan has power, the liquid outlet is connected correctly, and the solids chamber has adequate capacity. Check the seat, lid, access panels, and seals for movement or damage. If the toilet uses a crank or mixing handle, operate it gently and note unusual resistance. Grinding noises, intermittent fan operation, or a handle that suddenly turns freely can signal a component problem before the user sees an obvious symptom.
During active occupancy, a short weekly inspection is a practical starting point for many systems. Verify that liquid is reaching its intended container or treatment route, inspect the visible solids surface, confirm fan operation, and remove any buildup from the separation area using the manufacturer-approved method. Higher occupancy may justify checking every few days, especially during the first season when the household is learning how much bulking material and cleaning moisture the system tolerates.
A simple maintenance record makes capacity decisions more accurate. Note the date, number of regular users, unusual guests, liquid-container emptying, cleaning, and any odor or drainage change. This record can reveal that a problem appears only after long weekends, during freezing weather, or when the fan is powered from a battery system at reduced voltage. Such patterns are more useful than assuming the toilet has a permanent defect.
Priorities should be ordered by consequence:
- First: correct leaks, liquid backup, failed ventilation, and unsafe access conditions.
- Next: restore separation, moisture balance, and adequate bulking material.
- Then: clean surfaces, inspect fasteners and seals, and review capacity.
One weak assumption is that a composting toilet can be ignored because it uses less water than a flush toilet. Reduced water use does not remove the need for inspection; it shifts attention toward airflow, evaporation, liquid handling, and solids capacity. If the unit serves a full-time household, follow the equipment maker’s service intervals and any applicable local sanitation requirements rather than relying on a cabin-use schedule.
Troubleshooting Odor, Moisture, and Poor Decomposition
Odor is a diagnostic clue, not a complete diagnosis. A sharp urine smell often points toward liquid misrouting, a dirty separation surface, a blocked drain, or insufficient ventilation near the urine path. A sour or sewage-like smell from the solids chamber may indicate excess moisture, limited airflow, or a chamber that has been filled beyond the design level. The fastest fix is not always to add more dry material; first identify where the moisture or air restriction entered.
Begin by separating the possible sources. Smell near the bowl, the vent outlet, the liquid container, and the access hatch. Inspect for visible wetness and check whether the fan is actually running rather than merely connected to a switch. If the liquid container is full, its vapor can be noticeable even when the toilet itself is functioning normally. If the odor increases when the fan is off, ventilation is a stronger suspect. If it continues with good airflow, inspect separation, cleaning residue, and chamber moisture.
Wet solids may result from users sitting incorrectly, excessive urine entering the chamber, spilled liquids, or a drain that is partially restricted. Correct the entry route first. Remove accessible clumps only as the manual permits, add the specified dry bulking material in modest amounts, and restore mixing or aeration if the unit includes that feature. Dumping a large quantity of dry material on top can hide the wet center while leaving the underlying condition unchanged.
Poor decomposition is also affected by temperature and dwell time. A lightly used toilet in a cool building may not show rapid volume reduction, while a heavily used unit can accumulate material faster than its biological process can reduce it. That does not automatically mean the system has failed. It does mean the owner must distinguish between a slow process and an overloaded chamber. If material is reaching access openings, remains visibly saturated, or cannot be mixed safely, emptying or using a second approved container may be more appropriate than trying another additive.
Insects may appear when waste is exposed, ventilation is inadequate, or the chamber remains persistently wet. Keep screens intact, clean accessible surfaces, and correct the underlying moisture problem. Avoid pouring pesticides into the toilet unless the manufacturer specifically permits that product and use; chemical treatment can create equipment and handling hazards without solving the cause. The maintenance record is useful here because recurring odor after a particular cleaning routine or occupancy spike points to a correctable operating pattern.
Emptying, Cleaning, and Preparing for Seasonal Use
Emptying should be planned around capacity indicators, not delayed until the toilet produces an emergency symptom. Follow the unit’s instructions for identifying finished or partially processed material, because chamber design and approved handling procedures differ. Wear the protective equipment specified for the task, keep children and pets away from the work area, and wash hands and tools afterward. If the material is not clearly ready for the intended disposal or curing stage, treat it as unfinished waste and use the safer handling route described by the manufacturer or local authority.
Before opening the chamber, disconnect power where the manual directs, stabilize removable parts, and prepare a sealed container or bag that will not tip. Work slowly: sudden movement can disturb dry material, expose damp contents, or damage a sensor or mixing mechanism. Inspect the empty chamber for cracks, corrosion, loose fasteners, blocked drains, and residue around seals. A small repair completed during emptying is easier than discovering the same defect after the toilet has been returned to service.
Cleaning should remove contamination without flooding the system. Wipe the bowl, seat, lid, separation surface, and accessible edges with the approved cleaner. Clear mineral deposits from liquid-routing parts using the method allowed for that model. Do not scrape aggressively against plastic surfaces or force a rigid tool into a drain fitting. Reassemble seals and panels carefully; an air leak around an access hatch can affect odor control even when the main vent is unobstructed.
Seasonal shutdown creates a separate set of risks. In freezing conditions, liquid lines and containers may crack or become blocked by ice, while an unheated building can expose residual moisture to freeze damage. Drain, empty, or protect those components according to the manufacturer’s procedure. For a long vacancy, leave the toilet clean and dry as directed, secure the vent against pests without restricting required airflow, and record the condition of the fan and power supply.
Restarting deserves the same care as shutdown. Confirm that the liquid route is open, the fan operates, the vent is connected, and the chamber has the correct starter material or bulking medium. A useful pre-use inspection takes only a few minutes but can expose a disconnected hose or dead fan before the first guests arrive. The mistake to avoid is assuming that an idle toilet has been preserved simply because it was unused; stagnant liquid, dried deposits, pests, and freeze damage can develop without any occupants.
Frequently Asked Questions
How often should a composting toilet be inspected?
Inspect it before use and during occupancy. Weekly checks suit many lightly used installations, while full-time or high-occupancy systems may need checks every few days.
What usually causes odor in a composting toilet?
Common causes include excess moisture, poor urine separation, a blocked drain, inadequate ventilation, a full liquid container, or exposed solids. Locate the odor source before adding material.
Can bleach be used to clean a composting toilet?
Do not assume bleach is compatible. Use the cleaner and dilution recommended for the specific model, since harsh chemicals or excess water may damage parts or disrupt operation.
When should the solids chamber be emptied?
Empty it before material reaches the design limit or becomes difficult to mix and access. Follow the manufacturer’s instructions for recognizing finished material and handling unfinished waste.
What should be checked after winter storage?
Inspect liquid lines, containers, seals, vent connections, screens, fan operation, and the chamber for cracking, deposits, pests, or freeze damage before returning the toilet to service.
Further Reading
Authoritative Sources
- Academy of Nutrition and Dietetics
eatright.orgProfessional nutrition guidance, healthy eating resources, and practical dietitian-reviewed advice.
- U.S. Department of Agriculture
usda.govOfficial food, nutrition, agriculture, and consumer guidance from the USDA.
- NIH Office of Dietary Supplements
ods.od.nih.govResearch-based fact sheets on nutrients, supplements, dietary intake, and safety considerations.
- International Society of Sports Nutrition
sportsnutritionsociety.orgEvidence-informed sports nutrition resources and position stands for active people and athletes.
Conclusion
Reliable composting toilet operation comes from controlling a few physical conditions before they become visible sanitation failures. Give priority to liquid separation, unobstructed ventilation, sensible moisture control, and available chamber capacity. A short inspection log can connect symptoms to occupancy, weather, power interruptions, or cleaning habits, making corrective action more precise. Empty and clean the system before capacity becomes urgent, and treat seasonal shutdown as a maintenance task rather than simple nonuse. Keep the model’s instructions available for approved cleaners, bulking materials, emptying procedures, and freeze protection. When odor, insects, wet solids, or drainage changes persist after basic checks, stop treating the symptom and investigate the vent, drain, seal, or loading pattern that is driving it.