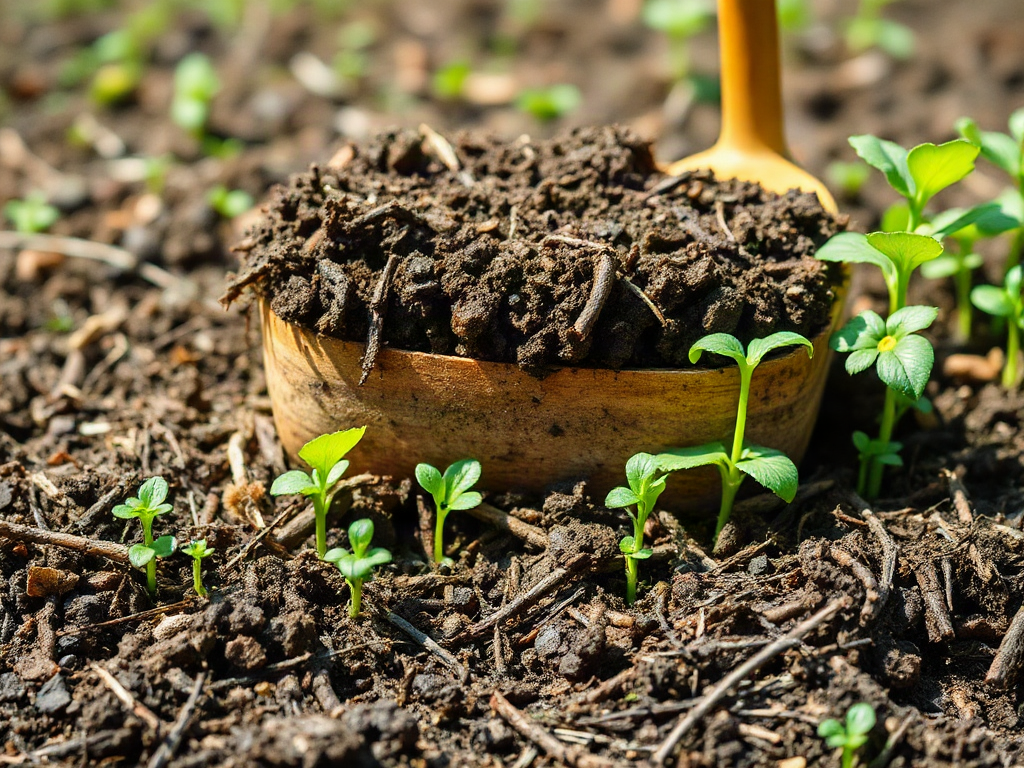
No-till gardening for beginners improves soil and weed control by leaving the ground undisturbed, suppressing unwanted growth with overlapping organic layers, and planting through the mulch rather than turning the bed. Begin by cutting existing weeds low, watering dry ground, laying plain cardboard where perennial weeds are manageable, and adding compost beneath a 3- to 5-inch mulch layer. Keep mulch away from crop stems and replenish it as it decomposes. Dig only when removing persistent roots, correcting severe compaction, or creating planting holes; no-till is a soil-management method, not a rule against every use of a spade.
How No-Till Changes Garden Soil
No-till management protects the soil profile instead of repeatedly mixing its layers. Garden soil contains mineral particles, organic matter, roots, fungal threads, pore spaces, and organisms that move water and nutrients. Turning the bed can temporarily loosen the surface, but frequent cultivation also breaks aggregates, exposes buried weed seeds to light, and leaves bare soil vulnerable to crusting and erosion.
A covered, minimally disturbed bed develops differently. Plant roots create channels that can carry water and air below the surface. Earthworms and other soil organisms pull decomposing residues downward, while compost and mulch add organic material from above. The result is not instant softness throughout the bed. Early improvement is usually most noticeable near the surface, especially where moisture remains steady and organic layers are replenished.
No-till should not be confused with never touching the ground. A gardener may still pull a taproot, loosen the sides of a planting hole, divide a perennial, or use a fork to relieve a compacted patch without flipping the soil. The useful distinction is between limited intervention and routine inversion of the entire bed. If construction traffic has compressed subsoil or buried rubble is blocking drainage, mulch alone will not correct the physical obstruction.
Soil texture also affects expectations. Sandy ground drains quickly and consumes organic mulch rapidly, so moisture retention may improve before nutrient-holding capacity does. Clay soil can remain wet beneath a heavy layer, particularly in a low area. A simple field check is more useful than assumptions: squeeze a handful of moist soil. If it smears and holds a dense ribbon, delay planting and avoid walking on it; if it crumbles with visible pores and roots, preserve that structure.
Progress should be judged by infiltration, root growth, surface condition, and digging resistance rather than by whether the bed resembles bagged potting mix. Water that enters instead of puddling, roots that spread beyond the transplant hole, and declining annual-weed germination are meaningful signs. Readers developing a broader system for No-till gardening for beginners: soil and weed control should prioritize continuous cover and limited traffic before buying specialized amendments.
Preparing a New Bed Without Turning the Ground
A successful new bed begins with an honest assessment of its existing vegetation. Short annual weeds, lawn grass, creeping perennial weeds, and woody plants do not respond equally to being covered. Sheet mulching can smother turf and many seedlings, but established bindweed, horsetail, nutsedge, or similar plants may push through gaps and require repeated removal. Shrub roots, buried landscape fabric, and compacted fill call for physical correction before layering begins.
Mark the bed and paths first so cultivated ground will not become a walkway. Cut vegetation as close to the soil as practical, leaving roots in place unless the plant spreads aggressively from roots or underground stems. Water dry soil before covering it. Moisture applied after a thick layer is installed may run sideways or take longer to reach a hard, dry surface.
For manageable lawn or annual weeds, overlap pieces of plain brown cardboard so light cannot enter at the seams. Remove tape, labels, and glossy or heavily coated pieces. Wet the cardboard until it conforms to the ground, then add roughly 1 to 2 inches of finished compost and 3 to 5 inches of coarse organic mulch. Compost supplies a plantable upper layer; mulch slows evaporation and blocks light. On windy sites, apply the covering immediately so cardboard cannot lift.
Planting time determines whether this method feels easy or frustrating. A bed prepared several months before planting has time to settle and begin decomposing. If vegetables must go in immediately, cut an opening through the cardboard for each transplant, remove the underlying sod from that small hole if necessary, and backfill around the root ball with compost and native soil. Direct-sown carrots or lettuce need a narrow row of fine compost with the coarse mulch pulled aside; seeds placed in wood chips may dry out or fail to contact soil.
A compact startup sequence keeps the work focused:
- Inspect: identify perennial weeds, drainage problems, debris, and the direction water moves.
- Define: establish permanent beds narrow enough to reach without stepping into them.
- Suppress: cut growth low and cover it with overlapping, light-blocking material where appropriate.
- Build: add mature compost and a mulch suited to the crop and climate.
- Monitor: check seams, edges, moisture, and regrowth every week during establishment.
The common mistake is piling material over an unidentified problem. Cardboard over saturated clay can slow surface drying, while a thin layer over vigorous rhizomes merely hides growth temporarily. Preparing the site around its actual constraints is more reliable than following a fixed recipe.
Choosing and Applying Mulch for Weed Control
Mulch controls weeds mainly by excluding light and creating a surface where new seedlings are easier to remove. It does not kill every perennial root, and it cannot stop seeds blown onto the bed. The material, depth, and timing must therefore match both the crop and the weed pressure.
Coarse arborist wood chips are durable around berries, fruit trees, paths, and widely spaced perennial vegetables. They knit together, resist rapid compaction, and usually provide longer suppression than a thin layer of compost. In an annual vegetable bed, chopped leaves, clean straw, dried grass clippings applied in thin layers, or partially decomposed leaf mold can be easier to move aside for sowing. Fresh grass should not be placed in a thick wet mat because it can become slimy and restrict air movement.
Compost and mulch perform different jobs. Finished compost improves the planting surface and supplies decomposed organic matter, but weed seeds can germinate readily in exposed compost. A coarser cover above it reduces that opportunity. Conversely, burying wood chips in the root zone is different from leaving them on top; surface chips are less likely to interfere with crop establishment than chips mixed through the soil.
Depth should be measured after the material settles. A sparse dusting of leaves allows light through and often becomes a seedbed. An excessively deep layer can keep cool spring soil cold, shelter slugs in damp climates, and prevent light rain from reaching the ground. Begin around 3 inches in closely managed vegetable beds and use closer to 5 inches where coarse material and strong perennial weed pressure justify it. Pull the cover back to inspect moisture before adding more.
Edges deserve more attention than the center. Lawn grass and creeping weeds enter where cardboard ends, irrigation misses, or mulch becomes thin. A narrow inspection strip around the perimeter makes new runners visible. Remove breakthroughs while small, trace spreading stems back to their entry point, and patch open seams rather than scattering another light layer over the whole bed.
Mulch is working when the soil beneath stays evenly damp, most emerging weeds are shallow-rooted, and the cover remains loose rather than sour or waterlogged. It is failing when runners repeatedly penetrate from the border, seedlings appear across exposed compost, or the underlying soil remains dry after watering. Adjusting material and depth based on those signs is more effective than treating mulch as a one-time installation.
Planting, Watering, and Feeding a No-Till Bed
Plant roots need contact with soil or mature compost, not a pocket of undecomposed mulch. For a transplant, draw the mulch aside, make a hole only large enough for the root ball, and set the plant at the appropriate depth. Return mulch around the plant after watering, leaving a small open collar around the stem. Mulch pressed against tomato, squash, or pepper stems can hold excess moisture and obscure early rot or pest damage.
Direct seeding requires a different surface. Pull coarse material away to expose a strip, add fine, weed-free compost if the existing surface is rough, and sow at the depth required by the crop. Keep that strip consistently moist until seedlings establish. Once the plants are tall enough, move a light layer of mulch closer without burying their growing points. Small seeds are less forgiving than transplants, so a first-year gardener may find transplanted brassicas, tomatoes, and herbs easier than broad beds of tiny direct-sown crops.
Water behavior changes under cover. The surface may look dry while the root zone remains moist, or damp mulch may conceal dry soil beneath cardboard that has not fully softened. Push a finger or narrow trowel below the mulch before irrigating. Water slowly enough to penetrate the entire layer, then check again later. Drip lines generally belong beneath mulch, where water reaches soil directly and evaporation is reduced; inspect emitters periodically because the cover hides blockages.
Feeding should be based on crop demand and observable soil conditions rather than an assumption that more organic material is always better. A modest top-dressing of finished compost before planting often suits ordinary vegetable beds, but compost quality and nutrient content vary. Excessive rich compost can encourage lush growth, create nutrient imbalances, or move nutrients beyond the root zone. A soil test from a reputable laboratory is useful when growth is persistently weak, pH is unknown, or the site has received repeated manure applications.
Keep permanent paths covered separately and avoid standing in beds, especially after rain. Foot pressure can undo the pore structure that roots and soil organisms are building. If access is difficult, reduce bed width rather than accepting routine compaction. The most practical No-till gardening for beginners: soil and weed control layout is one that lets the gardener plant, weed, and harvest from the path.
Diagnosing Weeds, Compaction, and Other Failures
Early problems are signals to adjust the system, not proof that no-till has failed. New beds commonly show regrowth at cardboard seams, seedlings in disturbed planting holes, temporary nitrogen stress in poor soil, or slug activity under moist cover. Each symptom points to a different cause, so adding more mulch indiscriminately can make some conditions worse.
Identify whether a weed came from seed, a surviving crown, or an underground runner. Seedlings usually pull easily from loose mulch or compost and decline when removed before flowering. A perennial that repeatedly emerges from the same point should be dug selectively to remove its crown or weakened through persistent cutting. Creeping growth entering from outside the bed requires border control. Covering its visible tip without addressing the connected source only delays another outbreak.
Compaction needs a physical check. If water puddles after ordinary rain, roots circle within planting holes, and a garden fork barely enters moist—not saturated—soil, the bed may have a dense layer. Insert a broadfork or garden fork vertically and rock it back enough to open channels without turning the profile. Work only when the soil is moist enough to fracture rather than smear. Severe construction compaction, buried stone, or a hardpan may require more substantial initial loosening; returning to full-bed cultivation every season is not the only alternative.
Yellow plants can be caused by cold soil, excess water, root damage, unsuitable pH, or inadequate nutrients. Do not blame surface wood chips automatically. Pull back the cover, smell the soil, inspect roots, and compare moisture in a healthy and unhealthy part of the bed. Sour odor and saturated soil suggest poor aeration; dry soil beneath wet-looking mulch suggests irrigation is not penetrating. A laboratory soil test is more informative than applying several amendments at once.
Slug damage often rises where thick, wet mulch touches tender seedlings. Reduce hiding places near the crop, water in the morning, remove badly matted material, and inspect after dusk. In a cool wet spring, delaying full mulch depth until plants gain size may be a sensible tradeoff, even though weed suppression is temporarily weaker.
Seasonal records make diagnosis easier. Note where weeds break through, how quickly mulch disappears, which areas puddle, and whether crop roots extend into native soil. Improvement may take more than one growing cycle on neglected ground. A workable system becomes less labor-intensive when corrections target the observed failure rather than restarting the bed.
Frequently Asked Questions
Can I Start a No-Till Garden Directly Over Grass?
Yes, if the grass is cut low and fully covered with overlapping cardboard, compost, and several inches of mulch. Remove or repeatedly weaken creeping perennial grasses that can travel beyond the covered area.
Should Compost Go Above or Below Cardboard?
For a new bed over grass, cardboard commonly goes on the ground with compost and mulch above it. If planting immediately, create openings that let transplant roots reach soil rather than leaving them confined above dry cardboard.
Will Wood-Chip Mulch Take Nitrogen From Vegetable Plants?
Wood chips left on the surface behave differently from chips mixed into the root zone. Keep coarse chips as a top layer, plant into soil or finished compost, and investigate moisture, temperature, pH, and nutrients before attributing yellow growth to mulch.
How Often Should Mulch Be Replaced?
Inspect it each season and replenish only after checking the settled depth and soil moisture. Fast-decaying leaves may need topping up sooner than coarse wood chips, while a wet bed may benefit from less material rather than more.
Is Digging Ever Appropriate in a No-Till Garden?
Selective digging is reasonable for removing perennial crowns, correcting buried debris, harvesting root crops, or relieving severe compaction. The goal is to avoid unnecessary full-bed inversion, not to prohibit every tool from entering the soil.
Further Reading
Authoritative Sources
- USDA Natural Resources Conservation Service: Soil Health
nrcs.usda.govThis resource explains soil cover, disturbance, living roots, and other principles relevant to managing a no-till garden
- University of Minnesota Extension: Cover Crops and Green Manures
extension.umn.eduThis extension resource describes how living covers can protect soil and contribute organic matter between food crops
- Oregon State University Extension: Mulching Woody Ornamentals With Organic Materials
extension.oregonstate.eduThis publication provides practical background on organic mulch behavior, placement, and common application concerns
- Penn State Extension: Soil Testing
extension.psu.eduThis resource explains why testing is useful before attempting to correct pH or nutrient problems with amendments
Conclusion
A dependable no-till bed is built through accurate observation rather than strict avoidance of tools. Identify the existing weeds, correct drainage or buried obstructions, define permanent paths, and then apply compost and mulch for distinct purposes. Keep coarse material away from seed rows and crop stems, verify moisture beneath the cover, and repair thin edges before weeds become established.
During the first season, watch where water collects, where roots stop, and which weeds return from underground structures. Pull annual seedlings early, deal directly with persistent crowns and runners, and loosen only the compacted areas that need intervention. Replenish organic cover as it decomposes instead of following a fixed calendar. Those small, targeted decisions protect soil structure while making weed control progressively more manageable.