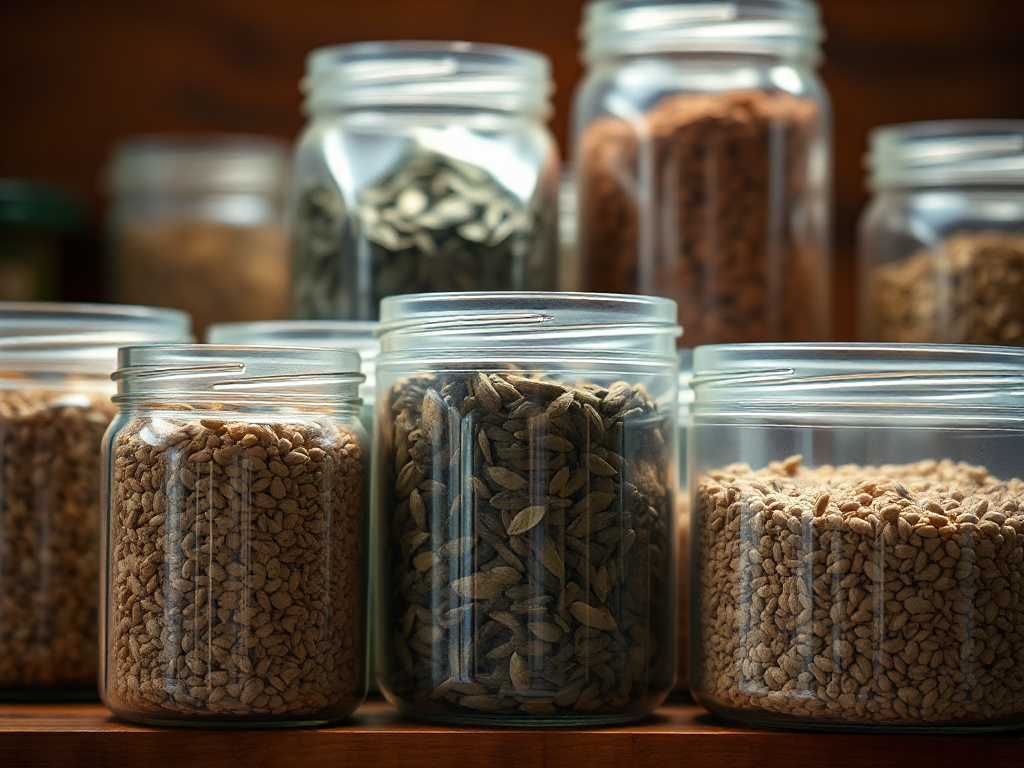
Store seeds for long-term self-sustainability by using fully mature, thoroughly dry seed in airtight, labeled containers kept in a cool, dark, stable environment. Remove plant debris, separate damaged seeds, and add a desiccant packet so humidity does not trigger mold or premature aging. Paper envelopes alone are suitable for short-term organization but allow moisture exchange, while sealed glass jars or quality moisture-barrier bags offer stronger protection. Record the crop, variety, harvest year, and source, then test a sample before planting and rotate older lots first.
What Makes Seeds Last in Storage
Seed longevity depends mainly on moisture, temperature, oxygen exposure, light, and the natural durability of the crop. A dry seed held in a stable, dark location generally ages more slowly than one exposed to a warm shed, fluctuating humidity, or direct sunlight. The objective is not simply to hide seeds from view; it is to slow the biological and chemical processes that gradually reduce germination.
Different crops have different storage potential. Beans, peas, lettuce, radish, cucumber, and many brassicas often remain useful for several growing seasons when harvested and stored well. Onion, parsnip, spinach, and some other crops tend to lose vigor sooner. A seed reserve built for self-sustainability should therefore contain more than one season’s planting requirement, but it should not assume every packet will remain equally viable for a decade.
Seed maturity matters before storage begins. Seeds collected from immature fruit may be poorly developed, while seeds taken from diseased or stressed plants may carry problems into the next planting. For vegetables such as tomatoes, mature fruit and appropriate fermentation or cleaning can improve the quality of the saved material. Dry-seeded crops should remain on the plant until the pods or seed heads are mature and beginning to dry, provided weather and pests allow it.
A useful reserve combines biological diversity with practical rotation. Save dependable varieties suited to the local climate, include crops that provide calories as well as fresh produce, and keep enough seed for a failed germination test or an unexpectedly poor season. A jar of old seed is not the same as a resilient planting plan. The related seed storage system should support annual renewal rather than encourage indefinite neglect.
Preparing and Drying Seed Before Packing
Thorough drying is the most important preparation step for ordinary garden seed. Surface dryness is not enough: seeds can feel dry while still retaining moisture internally, especially when collected from fleshy fruit. Moisture trapped in a sealed container can support mold, cause clumping, and accelerate loss of viability. Spread cleaned seed in a thin layer on a labeled plate, screen, or sheet of paper in a dry room with gentle airflow.
Avoid high heat as a shortcut. A hot attic, oven, or dehydrator set for food preservation may damage living seed tissue even when the seed looks unchanged. Room-temperature drying takes longer but is easier to control. Stir or move the seed periodically so the underside does not remain damp. Large seeds should be given extra time because their centers dry more slowly than their surfaces.
Cleaning method depends on the crop. Remove chaff and broken pieces from dry pods by hand or through careful winnowing. For tomato and similar wet-seeded crops, separate the seed from pulp, rinse away residue, and allow the seed to dry completely. A small amount of remaining plant material can hold moisture against the seed, so visual cleanliness is useful even when perfect purity is unnecessary.
Before sealing a batch, inspect it under bright light. Discard seeds that are soft, discolored, insect-damaged, cracked, or visibly moldy. Do not mix newly harvested seed with older seed before it has been dried and assessed. A simple preparation sequence is:
- Identify the crop and variety while the source is still known.
- Clean away pulp, chaff, damaged seed, and obvious debris.
- Dry in a thin layer until the batch is free-flowing and shows no signs of dampness.
- Package only after cooling and drying are complete.
The failure mode to avoid is sealing seed because it feels dry after a single afternoon. If a container fogs, the seed clumps, or an earthy odor develops, moisture was likely present. Remove the batch, inspect it, and dry it again only if there is no mold. Seeds already affected by mold should not be treated as dependable planting stock.
Containers, Locations, and Temperature Choices
Use an airtight inner container for seed intended to last beyond the next planting season. Small glass jars with sound lids, heat-sealed moisture-barrier bags, and sturdy sealed plastic containers can work when the seed is already dry. Paper envelopes are excellent for labeling and sorting inside a larger sealed container, but paper by itself is not a strong moisture barrier in a humid room.
Add a small desiccant packet when appropriate, keeping it separate from loose seed or placing it in a secondary pouch. Desiccant cannot rescue damp seed; it is a safeguard against residual humidity inside the package. Do not use a packet that is wet, damaged, or intended for a purpose that could contaminate the seed. Seal each crop separately so one compromised batch does not expose the whole reserve.
The storage location should be cool, dark, and stable. A cupboard inside the living area may be safer than an outdoor shed because it avoids summer heat, freezing-thawing cycles, pests, and condensation. A refrigerator can be useful for a well-sealed collection, but every container must be allowed to reach room temperature before opening. Opening a cold jar in humid air can introduce condensation directly onto the seed.
Freezing requires stricter moisture control. Very dry seed in genuinely moisture-proof packaging may tolerate freezing, but a poorly sealed packet can suffer from condensation or ice-related damage during handling. Freezing is therefore an advanced option, not a prerequisite for household seed saving. For most gardeners, a stable cool cabinet with good packaging and annual checks offers a simpler balance of protection and accessibility.
Keep storage away from fuel, solvents, strong odors, and pest-control products. Seeds can absorb odors, while rodents and insects can damage packaging. An opaque outer box provides additional protection from light and makes it easier to organize packets by crop and planting season. The best container is the one that remains sealed, labeled, and easy to inspect rather than the most expensive option.
Labeling, Testing, and Rotating a Seed Reserve
Every package should identify the crop, variety, source, harvest year, and any relevant notes about isolation or selection. A date without a variety name is not enough for long-term self-sustainability because it prevents you from comparing performance and preserving traits that matter locally. Use labels that remain readable in cool storage and place a duplicate inventory outside the container.
Track quantities realistically. Note whether a packet contains enough seed for one bed, several succession sowings, or only a trial. This prevents a common planning error: owning many varieties but not enough viable seed of the crops that provide reliable calories or repeated harvests. For a household reserve, prioritize crops that grow well in the local conditions and that you can harvest, clean, and save again.
Germination testing turns an assumption into useful information. Place a known number of seeds between damp paper towels or in a small tray, keep them at a suitable temperature for that crop, and count normal seedlings after the appropriate period. The exact result depends on the species, but a weak test tells you to sow more thickly, reserve the batch for backup, or replace it rather than discovering the problem after planting time.
Rotate older seed first. Each year, review the inventory, test aging lots, and grow a portion of the reserve when conditions allow. Save fresh seed from healthy, desirable plants and replace what was used. This living rotation is more dependable than storing a large quantity and never renewing it. It also reveals which varieties mature reliably, resist local pressure from pests or disease, and produce seed within the available season.
Separate emergency reserve from active-use seed. Active packets can be opened often, while a reserve container should remain sealed except for scheduled inspection. For example, keep a working supply of lettuce and beans in a household cabinet, but store backup quantities in sealed packages with a dated inventory. That arrangement reduces repeated exposure to humid air and makes the reserve easier to audit.
Common Storage Mistakes and Practical Priorities
The most damaging mistake is treating storage as a container problem alone. A perfect jar cannot correct seed that was harvested immature, stored damp, or exposed to repeated heat. The second common error is assuming a commercial packet’s printed date automatically predicts household viability. Dates help with rotation, but actual germination depends on crop, initial quality, moisture, temperature, and handling history.
Another weak assumption is that more seed always equals more security. A large stock of one variety may fail if the variety is poorly adapted to the site or if the harvest season does not provide enough time for mature seed. A smaller, tested collection of locally suitable crops can be more useful than a large assortment chosen without regard to climate, soil, daylight, or household food needs.
Prioritize the system in this order: preserve seed quality, protect it from humidity, make identification effortless, test before relying on it, and renew the collection. If resources are limited, spend first on reliable labels, airtight packaging, and a dry storage location rather than specialized equipment. A basic setup of envelopes inside sealed jars, with desiccant and an inventory sheet, can outperform elaborate equipment used inconsistently.
Watch for signs of failure during inspection: fogging, clumping, insects, chewed packaging, mold, faded labels, or an unexplained drop in germination. Move affected items away from the main reserve immediately. Do not open every package on a humid day just to check it; inspect the outer inventory and schedule detailed checks when the room is dry. These small operational choices reduce the chance that monitoring itself introduces moisture.
Long-term self-sustainability also requires seed-saving skills, not just preservation. Learn which plants cross-pollinate, how many plants may be needed for reasonable genetic diversity, and which fruits should remain on the plant for mature seed. If a crop cannot reliably produce seed in your conditions, keep a replacement source while developing a more suitable alternative. The storage plan succeeds when it links careful preservation to a repeatable cycle of growing, selecting, harvesting, testing, and replenishing.
Frequently Asked Questions
Should seeds be stored in paper envelopes or glass jars?
Use paper envelopes for labeling and organization inside a sealed jar or moisture-barrier container. Paper alone is more vulnerable to humid air.
Is refrigeration necessary for a seed reserve?
No. A cool, dark, stable cabinet may be sufficient. Refrigeration can extend storage for dry, sealed seed, but condensation must be avoided before opening.
Can damp seeds be saved with a desiccant packet?
Desiccant helps control residual humidity but should not be relied on to rescue damp seed. Dry the batch safely first and discard seed showing mold.
How often should stored seeds be tested?
Test older or high-priority lots before each planting season. A small sample can reveal whether sowing rates should increase or the batch should be replaced.
Which information belongs on a seed label?
Record crop, variety, source, harvest year, and useful notes such as isolation, selection, or observed growing performance.
Further Reading
Authoritative Sources
- Academy of Nutrition and Dietetics
eatright.orgProfessional nutrition guidance, healthy eating resources, and practical dietitian-reviewed advice.
- U.S. Department of Agriculture
usda.govOfficial food, nutrition, agriculture, and consumer guidance from the USDA.
- NIH Office of Dietary Supplements
ods.od.nih.govResearch-based fact sheets on nutrients, supplements, dietary intake, and safety considerations.
- International Society of Sports Nutrition
sportsnutritionsociety.orgEvidence-informed sports nutrition resources and position stands for active people and athletes.
Conclusion
A dependable seed reserve is built through a chain of modest controls: mature harvests, careful cleaning, complete drying, sealed packaging, stable temperatures, and readable records. Protect the collection from humidity before investing in advanced cold storage, then test aging lots instead of trusting appearance or dates alone. Rotate older seed into active use and replenish it with plants that perform well in the local growing conditions. Keep emergency quantities sealed separately from packets opened throughout the season, and treat signs such as condensation, pests, mold, or declining germination as reasons to act promptly. The next practical step is to inventory what you already have, remove questionable batches, package the strongest seed properly, and schedule a small germination test before the next planting window.