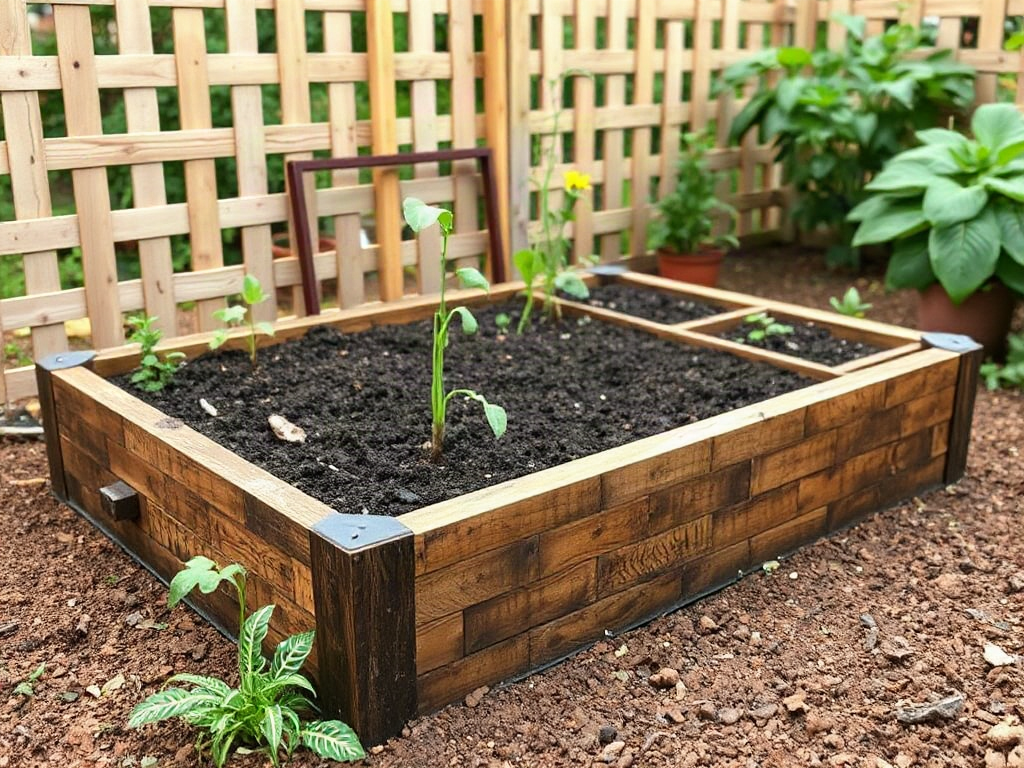
A beginner raised bed should have enough soil depth for the intended roots, free drainage beneath the growing mix, and access that never requires stepping into the bed. About 8–12 inches of soil suits many leafy greens, herbs, and compact vegetables, while deeper-rooted crops benefit from 12–18 inches or usable soil below an open-bottom frame. Place the bed on ground that releases excess water, fill it with a stable soil-and-compost blend, and keep its width within comfortable reach from both sides. Before building, check sunlight, hose access, path width, native soil conditions, and whether limited mobility calls for a taller, narrower structure.
Choose Bed Depth for the Crops and Ground Below
Raised-bed depth is the vertical amount of usable growing soil, not simply the height of the boards. An open-bottom frame that is 10 inches tall can provide considerably more rooting room when it sits over loosened, well-drained soil. The same frame placed over concrete gives roots only those 10 inches, making soil depth a stricter limit.
For many first beds, 8–12 inches of growing mix is a practical range. Lettuce, radishes, spinach, bush beans, many culinary herbs, and compact flowers can perform well within it when moisture and fertility are managed consistently. Tomatoes, peppers, cucumbers, carrots, and other larger or deeper-rooted plants are less constrained in 12–18 inches of soil. Those ranges are planning benchmarks rather than guarantees: cultivar, climate, soil texture, irrigation, and the condition of the ground below all affect usable rooting space.
Shallow beds cost less to fill and require less lumber, but they dry more quickly because they hold a smaller reservoir of water. They also leave less room for error if the soil settles. Very deep beds offer additional soil volume and can reduce bending, yet filling the entire structure with premium planting mix can be expensive and may be unnecessary for shallow-rooted crops.
A common mistake is choosing depth from photographs rather than from site conditions. A 6-inch frame over compacted construction fill does not become deep merely because it lacks a bottom. Before installation, push a garden fork into the ground and observe whether the soil is penetrable, waterlogged, or obstructed by stone and roots. Loosen compacted soil without removing its layers, and correct persistent drainage problems before adding the frame.
Deep containers, beds on pavement, and elevated planters need special treatment because roots cannot continue into native ground. These structures should provide the full rooting depth, drainage openings, and enough strength to carry saturated soil. For a first open-bottom garden on workable ground, a moderate frame is usually more efficient than an extremely tall one. The crop choice and underlying surface should determine depth—not the desire to fill an impressive-looking box.
Build Drainage Into the Site and Soil
Effective drainage depends on where water can go after it moves through the bed. Raised sides do not correct a low spot where runoff collects, and drainage holes cannot help if they empty onto an impermeable surface with no outlet. Observe the site after rain or irrigation. Standing water beside the proposed frame, saturated soil that remains glossy, or runoff flowing toward a building indicates that placement needs attention.
An open-bottom bed on ordinary garden soil usually drains through direct contact with the ground. Remove turf and perennial weeds, loosen the surface, and set the frame level enough to prevent water and soil from escaping one corner. On concrete or another hard surface, use a purpose-built bottom with multiple unobstructed outlets. Water must discharge safely without staining walls, undermining paving, or creating a slippery path.
The growing mix matters as much as the outlet. Straight garden soil can compact when confined, while pure compost may shrink substantially and can hold nutrients and moisture differently from a balanced mineral soil. A workable raised-bed mix combines screened topsoil or another mineral component with mature compost and an aerating material where needed. Exact proportions should respond to the materials available: sandy topsoil needs different amendment than dense clay-based soil.
Do not create a gravel layer at the bottom as a routine drainage fix. Water does not necessarily move freely from fine soil into a coarse layer; it can remain in the finer material above the boundary until that layer is wet enough to release it. Gravel also takes away rooting volume. Use coarse stone only when it is part of a deliberately engineered drainage route, not as a substitute for suitable soil and a functioning outlet.
After filling, water the bed thoroughly and inspect it rather than assuming the job is finished. A successful bed absorbs water without prolonged ponding, releases excess moisture through the bottom, and remains damp rather than swampy within the root zone. Soil that pulls away from the frame soon after watering is drying too fast; a surface that remains slick and saturated suggests compaction, excessive irrigation, or blocked drainage. The drainage discussion in Raised beds for beginners: depth, drainage, and access should therefore begin at the site, continue through the soil profile, and end at a safe discharge point.
Set Width, Height, and Paths for Comfortable Access
Bed width should be based on reach, because healthy raised-bed soil should not be walked on. Foot traffic compresses pore spaces, reduces oxygen around roots, and makes water infiltration less even. A bed accessible from both long sides is often kept near 4 feet wide, but that measurement is not universal. Gardeners with a shorter reach, restricted shoulder movement, or access from only one side need a narrower bed.
Test the width before building. Mark the proposed edges on the ground, kneel or stand in the expected working position, and reach toward the center while keeping your balance. You should be able to transplant, pull a small weed, and harvest without leaning on the frame or twisting. If the farthest point feels difficult when the bed is empty, it will be worse when tomato cages, foliage, or row covers obstruct the approach.
Height changes the working posture but does not automatically make a garden accessible. A 10- to 12-inch frame may be comfortable for someone who can kneel beside it. A taller bed can reduce bending for a standing gardener, while a wheelchair user may need knee clearance, a reachable soil surface, and controls or hose fittings that can be operated from a seated position. Greater height also increases soil volume, structural pressure, and cost. Long walls may require bracing to keep them from bowing after wet soil becomes heavy.
Paths deserve equal planning. Narrow gaps can trap a wheelbarrow, make turning difficult, and force the gardener against wet plants. Allow room for the widest equipment that will actually use the space, including mower handles, carts, mobility devices, and watering cans carried at the side. Firm, even paths are easier to navigate than loose, deep mulch, although the best surface depends on drainage, budget, and whether wheels must travel over it.
Access also includes utilities and seasonal work. Locate the bed within practical hose reach and leave room to repair an exterior wall, open a gate, install supports, or cover plants. Avoid placing the long side flush against a fence unless the bed is narrow enough to work entirely from the open side. A useful design keeps every planting position reachable and every path functional after crops reach mature size, not merely on construction day.
Plan the Bed Before Buying or Building
A simple site plan prevents the most expensive raised-bed errors: filling a poorly placed frame, discovering the center cannot be reached, or learning that water has no route away. Measure the area at the time of year when the garden will operate, and note shadows from buildings, fences, trees, and hedges. Fruiting vegetables generally demand more direct sun than leafy crops, so the intended planting list belongs in the siting decision.
Begin with one manageable bed rather than covering the yard with permanent structures. A smaller first installation reveals how quickly the mix dries, where runoff travels, and whether the paths remain usable. It also limits the volume of soil that must be purchased, moved, and corrected. Expansion is straightforward once the first bed demonstrates that the dimensions and location work.
Use this compact pre-build check:
- Mark the footprint: confirm that all sides remain reachable and doors, gates, drains, and utility access stay clear.
- Inspect the base: identify turf, aggressive perennial weeds, compacted subsoil, pavement, roots, and low areas.
- Match depth to use: account for crop roots, soil settlement, native ground, and any physical-access requirement.
- Trace the water route: decide where irrigation enters, where excess water exits, and what lies downhill.
- Price the complete build: include soil, compost, hardware, bracing, path material, irrigation fittings, and future top-ups.
Material selection follows the plan rather than leading it. Wood is easy to cut and modify but eventually weathers; metal panels can be durable but may have sharp edges or become hot to touch; masonry lasts but is difficult to relocate. Whatever the frame material, avoid products that could release unwanted contaminants into growing soil, and use corrosion-resistant fasteners appropriate to the material and outdoor exposure.
Fill soil in stages, lightly watering between lifts so hidden voids settle without aggressive compaction. Leave modest space below the rim for mulch and irrigation. Expect organic matter to decompose and the surface to drop over time; top-dress with finished compost rather than repeatedly replacing the entire mix. For readers comparing dimensions and site limitations, Raised beds for beginners: depth, drainage, and access is most useful when treated as a connected design problem rather than three separate purchasing decisions.
Frequently Asked Questions
How deep should a beginner raised bed be?
About 8–12 inches suits many common vegetables when an open-bottom bed rests on workable soil. Use 12–18 inches for greater root volume, deeper-rooted crops, poor ground below, or beds installed over a hard surface.
Does a raised bed need drainage holes?
An open-bottom bed on soil normally drains directly into the ground. A bed with a solid base or one placed on pavement needs multiple outlets that stay clear and release water to a safe location.
Should gravel go in the bottom of a raised bed?
Usually not. Gravel consumes root space and does not reliably correct compacted soil, a poor growing mix, or a site where water cannot escape. Improve the outlet and soil structure instead.
How wide should a raised bed be?
A bed worked from both sides is commonly no more than about 4 feet wide. Make it narrower when it is accessible from one side, when the gardener has limited reach, or when structures will obstruct access.
Can a raised bed be placed directly over grass?
Yes, but mow closely, remove persistent weeds, and consider a temporary layer of plain cardboard beneath the soil to suppress turf. Do not use an impermeable liner that prevents roots and water from reaching the ground.
Conclusion
A successful first raised bed begins with the conditions below and around the frame. Check whether native soil can accept water, select enough growing depth for the crop list, and verify every planting position can be reached without stepping onto the soil. Then account for mature plants, irrigation, path traffic, bracing, and the full cost of filling the structure.
Mark out one bed before purchasing materials and test your reach from the actual working position. After installation, water deeply and watch where moisture collects or exits. Adjust irrigation or surface mulch if the mix dries rapidly; investigate compaction or a blocked outlet if it remains saturated. Starting with a moderate, observable setup makes later expansion easier and gives you dimensions based on your site rather than a generic kit size.