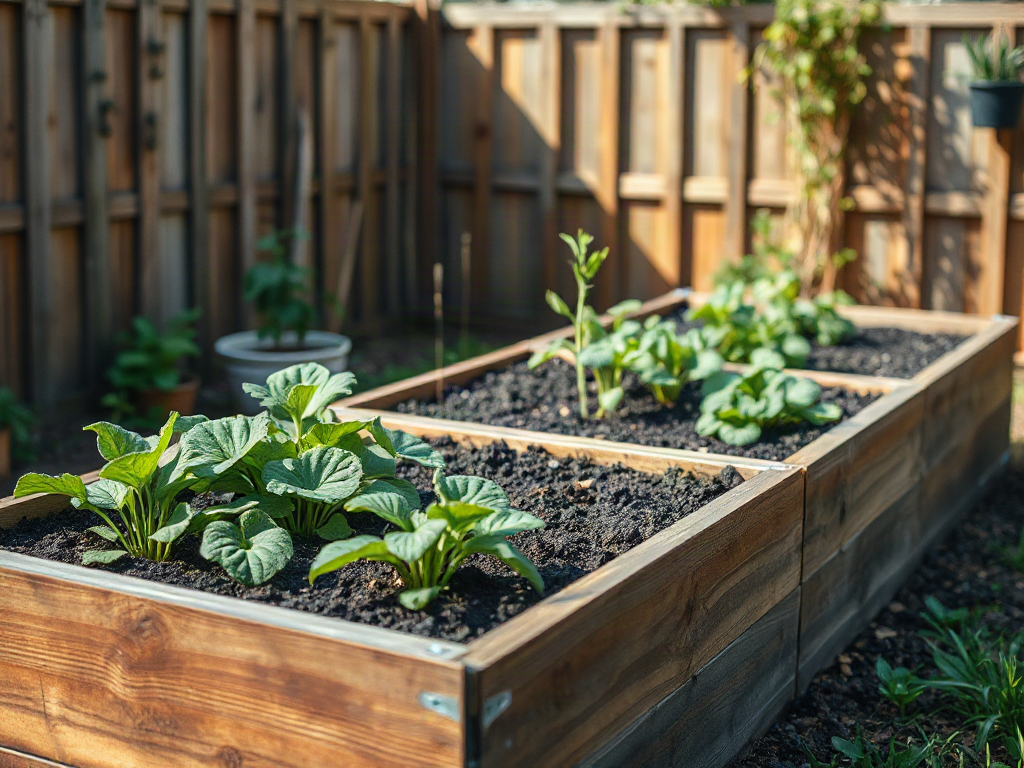
Choose the Bed Location, Size, and Depth
Sun exposure and access determine whether a raised bed remains productive and manageable. Fruiting vegetables such as tomatoes, peppers, cucumbers, and bush beans generally need at least six hours of direct sunlight, with eight hours often preferable where summer heat is moderate. Lettuce, spinach, radishes, and some herbs tolerate less light, but deep shade produces thin growth and slow harvests. Observe the proposed location at several points during the day because fences, trees, and buildings can create shade that is not obvious during a single visit.
A beginner-friendly bed is narrow enough to reach the center without stepping on the soil. Four feet is a practical maximum width when the bed is accessible from both long sides; against a wall or fence, keep it closer to two feet. Length is flexible, although a shorter bed is less expensive to fill and easier to water evenly. Leave paths wide enough for kneeling, carrying a watering can, or moving a wheelbarrow. A bed placed tightly between obstacles may look efficient but becomes frustrating once plants spill over its edges.
Bed height and usable soil depth are related but not identical. A frame that stands 12 inches high may provide less growing depth if it sits over compacted ground, landscape fabric, or an impermeable surface. Leaf lettuce and radishes can grow in relatively shallow soil, while tomatoes, carrots, chard, and other substantial crops perform better with more root room. Ten to 12 inches of good soil is a versatile starting point over open ground. Use a deeper bed when gardening over pavement, accommodating limited mobility, or growing long-rooted vegetables.
Drainage must have an outlet. On soil, loosen the ground beneath the frame with a garden fork and remove perennial weeds before filling. Over concrete, provide sufficient soil depth and unobstructed drainage holes, while accounting for runoff that may stain or pool nearby. Avoid lining the bottom with plastic; it can trap water around roots. Cardboard may temporarily suppress grass over open ground, but thick, persistent barriers can restrict rooting and water movement.
Before purchasing lumber or soil, mark the footprint with string and confirm that every side can be reached. This simple test exposes cramped paths and hidden shade. A single well-positioned bed is usually more useful than several beds that exceed the gardener’s watering capacity. For related layout considerations, see Raised bed vegetable gardening for beginners.
Build Soil That Holds Water Without Becoming Waterlogged
Raised beds need a stable mixture of mineral soil, mature compost, and materials that preserve pore space. Filling a bed with native clay alone can produce a dense block, while pure compost may shrink substantially, hold nutrients unevenly, and dry differently as it ages. Bagged raised-bed mixes are convenient for small installations, but their contents vary. Read the label and look for a mixture rather than a product composed mostly of coarse woody material or peat-like ingredients.
A practical fill combines screened topsoil with finished compost and a lighter component used in moderation, such as pine fines, coir, or another locally available amendment. Exact ratios should respond to the ingredients: sandy topsoil needs more organic matter for water retention, while heavy soil needs more structure and careful mixing. Finished compost should smell earthy and show no recognizable food scraps. Unfinished compost can continue decomposing in the bed, temporarily competing for nitrogen or exposing young roots to excessive heat.
Fill gradually and mix components throughout the root zone instead of creating sharply separated layers. A coarse gravel layer at the bottom does not automatically improve drainage; water can remain perched above the boundary between fine soil and coarse material. Consistent texture and a clear exit for excess water are more dependable. Settle the fill with gentle watering, then top it up if necessary. Do not compress it by walking in the bed, because squeezed pore spaces reduce oxygen around roots.
Soil tests provide better fertilizer guidance than guessing from plant color. A laboratory or extension-based test can identify pH and nutrient conditions, although the recommended tests vary by location. Without a test, avoid adding lime, wood ash, or large fertilizer doses simply because they are common garden products. Excess nutrients can damage roots, produce leafy plants with poor fruiting, or move out of the bed in drainage water.
Use this compact pre-plant check:
- Moisture: Damp soil should hold together lightly but crumble when pressed.
- Drainage: Water should soak in rather than remain pooled for hours.
- Depth: Confirm that the entire intended root zone contains usable soil.
- Volume: Expect some settling and retain extra mix for topping up.
Annual additions of finished compost are usually more sensible than replacing all the soil. Spread a modest layer and blend it into the surface before planting, taking care not to bury permanent crowns or established perennial herbs. Persistent slow growth despite suitable weather, adequate light, and correct watering is a reason to test the soil rather than continually adding fertilizer.
Select and Arrange Vegetables for the Available Season
Crop choice should follow temperature, season length, and bed capacity rather than a wish list alone. Cool-season vegetables such as peas, spinach, lettuce, carrots, and radishes can tolerate chilly conditions better than tomatoes, basil, cucumbers, or peppers. Warm-season seedlings placed into cold soil often stall, while spinach and peas planted near peak summer heat may bolt or decline quickly. Local frost guidance and seed-packet temperature information are more useful than a universal planting calendar.
For a first bed, combine several quick crops with one or two longer-season plants. In a four-by-eight-foot bed, a gardener might reserve the northern edge for trellised cucumbers, use the center for a few bush beans or compact peppers, and place lettuce or radishes along an accessible edge. Northern placement reduces the chance that tall crops shade shorter ones in the Northern Hemisphere; reverse the logic where the sun tracks across the northern sky. A full-size indeterminate tomato can occupy far more space than its transplant pot suggests, so two carefully supported plants may outperform six crowded ones.
Spacing labels describe mature plants, not seedlings. Crowding can create an impressive bed in early spring but later reduces air movement, complicates harvesting, and intensifies competition for water. Square-foot-style spacing can work when soil fertility and irrigation are closely managed, yet beginners should not treat maximum density as a target. Wider spacing is more forgiving during hot weather and makes pest inspection easier.
Seeds are economical for beans, peas, carrots, radishes, and many leafy greens because these crops establish readily where they will grow. Transplants save time for tomatoes, peppers, eggplants, and some brassicas, particularly where the season is short. Root crops generally dislike transplant disturbance. Check the mature size and days-to-harvest information before buying either form; a large pumpkin vine or sprawling winter squash can overwhelm a modest bed unless trained outward into a suitable area.
Succession planting keeps open soil productive without forcing every crop into the bed simultaneously. Radishes harvested in spring can make room for bush beans, while spent summer beans may be followed by autumn greens where the climate permits. The limitation is seasonal timing: a second crop needs enough suitable weather to mature. Record sowing dates and harvest dates rather than relying on memory. The planning approach in Raised bed vegetable gardening for beginners can also help match crop quantity to available bed space.
Signs of a workable layout include visible soil between young plants, easy access to stems, and supports installed before vines become tangled. Leaves pressed into a dense canopy, repeated midday wilting despite moist soil, or fruit hidden against the ground suggest that the planting is too crowded or poorly supported.
Water, Feed, and Inspect the Bed Through Harvest
Watering decisions should be based on root-zone moisture rather than a fixed daily schedule. Raised beds warm and drain quickly, which is useful in wet spring weather but can accelerate drying during heat and wind. Push a finger about an inch into the soil or use a small trowel to inspect below the surface. If that layer is dry, water slowly enough to wet the root zone. If it remains cool and moist, waiting can protect roots from continuously saturated conditions.
Morning watering gives foliage time to dry and reduces evaporation compared with the hottest part of the day. Apply water near the soil rather than repeatedly spraying leaves. A watering wand works for one small bed; a drip line or soaker hose provides greater consistency across longer beds. Whatever the method, test its reach by checking several locations after watering. Dry corners and saturated areas often reveal uneven pressure, kinked lines, or application that ended too soon.
Mulch moderates moisture swings once seedlings are established. Use a thin layer of clean straw, shredded leaves, or another weed-free organic material, keeping it away from plant stems. A thick, wet layer touching seedlings can shelter slugs or encourage stem problems. Mulch does not replace moisture checks because the surface may look dry while the soil below remains wet—or appear protected while the root zone has dried.
Feeding should reflect the crop and existing soil. Leafy vegetables use nutrients differently from fruiting crops, and compost-rich mixes may need little additional fertilizer at first. Pale older leaves, weak growth, and low yield can indicate nutrient trouble, but they can also result from waterlogged roots, cold soil, pests, or unsuitable pH. Diagnose the growing conditions before applying more product. If fertilizer is warranted, follow its label and keep granules away from stems and foliage.
Inspect the bed two or three times each week. Look under leaves for eggs or chewing insects, check stems for damage, remove weeds before they seed, and harvest vegetables promptly. A few holes rarely justify treating an entire bed. Hand removal, row covers installed before pests arrive, and removal of badly diseased material are often more proportionate first responses. Row covers must be lifted when insect-pollinated crops begin flowering unless flowers are being pollinated by hand.
Keep a brief record of rainfall, irrigation, planting dates, and recurring problems. Wilting that resolves overnight may reflect afternoon heat, whereas wilt in moist soil that persists into morning points toward root injury, disease, or severe stress. Healthy new leaves, steady flowering, and soil that remains evenly damp without sour odors are better indicators than rapid foliage growth alone. Adjust one factor at a time so the result is understandable rather than changing water, fertilizer, and pest controls simultaneously.
Frequently Asked Questions
How deep should a beginner’s raised vegetable bed be?
About 10 to 12 inches of usable soil suits many vegetables when the bed sits over open, loosened ground. Use greater depth over concrete or for long-rooted crops and improved wheelchair access.
Can I fill a raised bed with garden soil?
Garden soil alone may compact or drain poorly inside a frame. Blend suitable screened topsoil with finished compost and a structural amendment, adjusting the mixture for the soil’s existing texture.
How often should raised beds be watered?
Check the upper inch of soil instead of following a rigid schedule. Water slowly when it feels dry, then confirm that moisture reached several inches down without leaving the bed saturated.
What vegetables are easiest in a first raised bed?
Bush beans, leaf lettuce, radishes, chard, compact peppers, and supported cucumbers are manageable choices when planted in their proper seasons. Select only crops your household will harvest and eat.
Should landscape fabric go under a raised bed?
It is usually unnecessary over healthy soil and may restrict deep rooting. Remove persistent weeds first; temporary cardboard can suppress grass, while beds over hard surfaces need reliable drainage rather than a sealed liner.
Further Reading
Authoritative Sources
- USDA Plant Hardiness Zone Map
planthardiness.ars.usda.govThis official map provides winter-temperature context for perennial plants, though local frost dates are still needed for annual vegetables
- Raised-Bed Gardens
extension.umn.eduUniversity of Minnesota Extension explains bed placement, construction, soil, and maintenance considerations
- Raised Bed Gardening
extension.oregonstate.eduOregon State University Extension offers practical information about bed dimensions, materials, soil, and irrigation
- Integrated Pest Management Principles
epa.govThe EPA outlines a monitoring-first approach to controlling pests while limiting unnecessary treatment
Conclusion
A productive first raised bed comes from matching a manageable footprint to the site rather than maximizing bed count or plant density. Confirm sun and drainage, provide enough reachable soil depth, and use a balanced fill that retains moisture without remaining saturated. Choose crops for the current season, allow for their mature size, and reserve ambitious sprawling plants for a later season or a larger space.
Once planted, inspect moisture below the surface, water the root zone evenly, and respond to plant symptoms only after checking weather, soil, spacing, and pests. Record what was planted and when it succeeded or struggled. That record turns the next planting into an informed adjustment: fewer large plants, earlier sowing, improved irrigation coverage, or a crop better suited to the location.