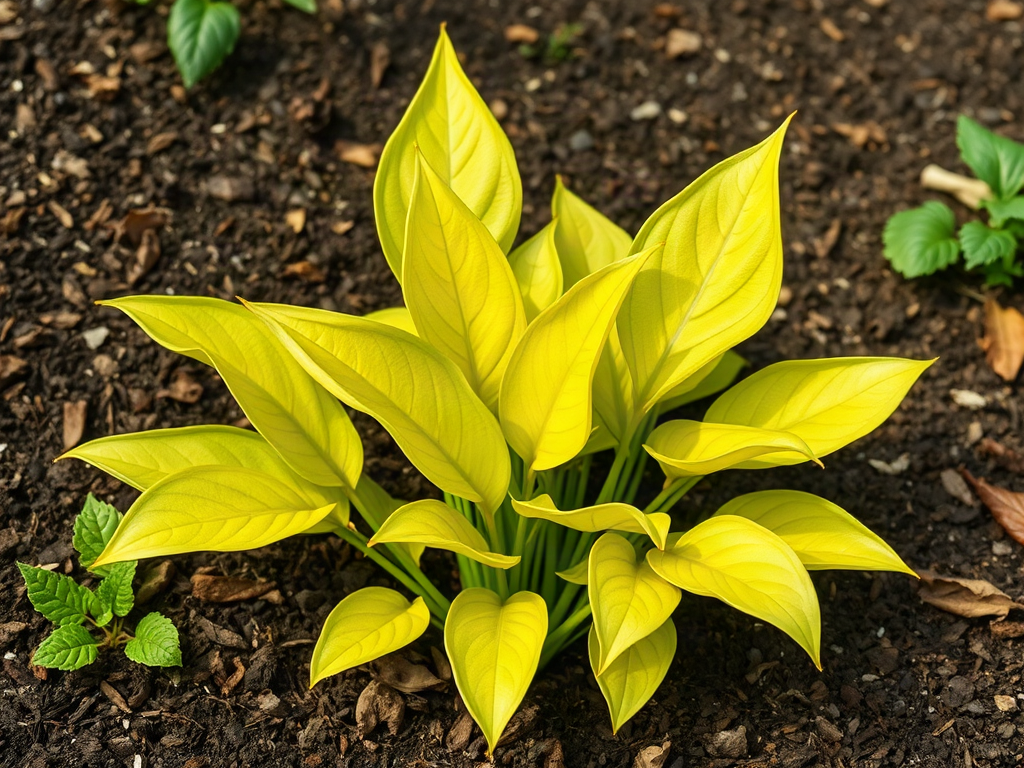
Diagnosing yellow leaves in a beginner garden works best by checking soil moisture, leaf position, discoloration pattern, and recent weather before adding fertilizer. Lower leaves that fade evenly often reflect normal aging or nitrogen shortage, while yellow tissue between green veins can point toward a nutrient-uptake problem. Wet soil, wilted growth, and widespread yellowing suggest stressed roots; dry soil and crisp margins indicate a different watering failure. Inspect one affected plant from roots to newest leaves, correct only the strongest suspected cause, and watch healthy new growth for improvement rather than expecting damaged leaves to turn green again.
Read the Yellowing Pattern Before Taking Action
The location and shape of yellow tissue reveal more than the color alone. Begin by comparing old leaves near the base with new leaves at the growing tip. Plants can relocate some mobile nutrients from older foliage into new growth, so shortages involving nitrogen often appear on lower leaves first. Problems involving less-mobile nutrients may become visible near the tip instead. This distinction is not a final diagnosis, but it narrows the possibilities before any treatment changes the evidence.
Notice whether an entire leaf has become pale or whether green veins remain visible against yellow tissue. Uniform fading differs from interveinal chlorosis, the striped or netlike pattern created when tissue between the veins loses color. Yellow edges, isolated spots, and sharply bounded patches are separate clues. A tomato plant with evenly pale lower foliage presents a different case from a bean leaf covered in angular yellow lesions or a cucumber leaf with yellow margins and a dry center.
Distribution across the bed matters too. One affected plant may have damaged roots, a stem injury, or a localized pest problem. Similar symptoms across several unrelated plants point more strongly toward irrigation, saturated soil, cold conditions, or another site-wide pressure. If only plants beside a downspout are yellow, excess water is more plausible than a garden-wide fertilizer shortage. If the row nearest a wall is affected after a cold night, temperature exposure may explain the pattern.
Take clear photographs and mark the date before removing leaves. Include the whole plant, both sides of an affected leaf, and the soil around the stem. Compare changes over several days. Old damage may remain visible after the cause has passed, while active trouble usually appears on additional leaves or interrupts new growth. A common beginner mistake is treating every yellow leaf as proof that a plant needs feeding. Fertilizer cannot repair flooded roots, and applying it without evidence can add salt stress to an already weakened plant.
The pattern-reading approach in Diagnosing yellow leaves in a beginner garden is most useful when observations are made before watering, pruning, spraying, or feeding. Preserve the original clues long enough to compare them.
Check Water, Drainage, and Root Conditions
Root-zone moisture should be investigated before nutrients because roots cannot function normally in soil that is continually saturated or extremely dry. Waterlogged pores contain too little air, which restricts root activity and nutrient uptake. The resulting plant may look pale and wilted even though plenty of water surrounds its roots. That apparent contradiction often leads beginners to water again, making the condition worse.
Push a finger or narrow trowel several inches into the soil away from the main stem. The surface can look dry while the root zone remains wet, especially in clay soil, large containers, or beds covered with mulch. Moist soil should feel cool and form a weak clump; saturated soil feels slick, dense, and may smell sour. In a container, confirm that water can leave through unobstructed drainage holes. A decorative outer pot may quietly hold runoff around the inner nursery pot.
Dryness produces a different progression. Leaves may lose firmness during the hottest part of the day, recover at night at first, and later develop yellow or brown edges if the root ball stays dry. Container plants are particularly vulnerable because water can run down a gap between a shrunken potting mix and the pot wall without wetting the center. Check the middle of the root ball rather than judging by runoff alone. Slow watering in two passes gives dry media time to absorb moisture.
Wilt is not a reliable command to irrigate. A recently transplanted pepper can droop because damaged roots cannot replace water lost through its leaves, while a squash may sag temporarily under midday heat and recover by evening. Water when the root zone is becoming dry for that crop, not merely because the foliage is down at noon. Deep, less-frequent irrigation generally encourages a larger wetted root zone than brief daily sprinkling, but sandy ground and small pots may require shorter intervals.
Correct drainage without aggressively disturbing stressed roots. Empty standing water from saucers, pause irrigation, clear blocked holes, and redirect roof runoff. In persistently heavy ground, future plantings may perform better in raised beds or amended planting areas, but mixing a small pocket of highly porous material into surrounding clay can create uneven water movement. A practical sign of recovery is firm, normally colored new foliage. Leaves already damaged by root stress may stay yellow even after moisture conditions improve.
Separate Nutrient Shortages From Soil Problems
A nutrient symptom does not automatically mean the soil lacks that nutrient. Roots may be unable to acquire what is present because the soil is cold, saturated, compacted, damaged, or outside a suitable pH range. Adding more fertilizer under those conditions treats the visible symptom rather than the uptake failure. It may also create excessive soluble salts or unbalanced growth.
Nitrogen shortage commonly causes older leaves to fade from green to a more uniform pale green or yellow while growth slows. It is plausible in containers with depleted potting mix, beds receiving little organic matter, or fast-growing vegetables that have been producing for weeks. Yet one yellow seed leaf on a vigorous seedling is usually normal aging, not a demand for fertilizer. Seed leaves naturally decline after true leaves take over photosynthesis.
Interveinal yellowing calls for closer attention to leaf age and crop type. Iron-related chlorosis often appears on young foliage because iron is not readily moved from old tissue, whereas magnesium-related patterns tend to begin on older leaves. Visual similarities make confident diagnosis difficult. Soil pH, root condition, fertilizer history, and a laboratory soil or growing-media test provide stronger evidence than color charts viewed in isolation.
For an in-ground bed, a soil test is more useful than buying several single-nutrient products. Follow the laboratory’s sampling directions and combine small subsamples from the relevant area rather than collecting only beside one sick plant. Keep separate samples for beds with different soil, treatment histories, or drainage. Container mixes require different interpretation because many are soilless and their nutrients can be depleted or leached more quickly.
If feeding is justified, use a product labeled for the crop and apply it according to its directions. More is not a faster correction. Fertilizer on very dry roots can cause injury, and repeated high-nitrogen applications may produce soft foliage at the expense of flowering or fruiting. Compost can contribute organic matter and nutrients over time, but it is not an immediate, precisely measured cure for every deficiency.
The safest principle for Diagnosing yellow leaves in a beginner garden is to fix water and root access first, then test or use crop-specific evidence before feeding. Improvement appears in steady growth and healthier new leaves, not necessarily in the recoloring of old foliage.
Rule Out Weather, Pests, Disease, and Normal Aging
Environmental stress can produce abrupt yellowing without a watering or fertilizer mistake. Cold soil slows root activity, and a late chill can pale heat-loving crops such as basil, peppers, and cucumbers. Intense sun can bleach leaves that were moved directly from indoor or shaded conditions, while hot reflected light can scorch exposed edges. Timing is decisive: symptoms that appear immediately after transplanting, a temperature swing, or a sudden move into full sun should be evaluated against that event.
Inspect leaves closely before assuming weather is responsible. Aphids often cluster around tender tips and leaf undersides, while spider mites can create fine stippling that merges into a bronzed or yellow appearance. Look for cast skins, webbing, sticky residue, distortion, or insects themselves. Check several leaves with a hand lens if available. A single insect does not prove damaging pressure; widespread feeding signs and declining growth carry more weight.
Disease patterns are often uneven rather than uniformly pale. Spots may have dark margins, concentric rings, water-soaked tissue, or angular boundaries limited by leaf veins. Remove a badly affected leaf only after documenting it, avoid handling wet foliage, and clean cutting tools between suspect plants. Do not compost material that local extension guidance identifies as unsuitable for home composting. Fungicide is not a universal response: it will not reverse existing lesions, and its usefulness depends on the organism, crop, timing, and product label.
Natural leaf turnover remains the simplest explanation when one or two shaded bottom leaves yellow on an otherwise vigorous plant. Dense tomato or kale foliage may shed older leaves that receive little light. By contrast, yellowing that climbs rapidly, reaches new growth, or accompanies stem collapse deserves prompt investigation. Inspect the stem at soil level for narrowing, discoloration, chewing, or rot, then look at the roots if the plant is already failing and can be lifted without sacrificing a valuable specimen.
Avoid combining treatments “just in case.” Spraying oil during hot sun, watering extra, and adding fertilizer on the same day can compound stress and erase diagnostic clues. Choose the explanation that best fits the symptom pattern, affected area, and recent timeline. Make one low-risk correction, record it, and reassess new growth over the following days.
Use a Cause-by-Cause Garden Checklist
A fixed inspection order prevents impulse treatments and makes repeat problems easier to recognize. Examine an affected plant in place, because its position relative to irrigation lines, shade, containers, and neighboring plants is part of the evidence. Compare it with a healthy plant of the same crop and similar age whenever possible.
- Map the symptom: Record whether yellowing begins on old or new leaves, affects veins or margins, and occurs on one plant or a wider area.
- Check below the surface: Test moisture several inches deep, verify container drainage, and look for compacted, foul-smelling, or unusually dry soil.
- Reconstruct recent changes: Note transplanting, fertilizer applications, heavy rain, irrigation failure, frost, heat, herbicide use nearby, or a move into stronger light.
- Inspect living tissue: Examine leaf undersides, stems, and the soil line for insects, webbing, lesions, rot, or physical damage.
- Choose one response: Correct the most strongly supported and least disruptive cause, then label or photograph the plant for comparison.
Prioritize reversible actions. Emptying trapped runoff or correcting an irrigation schedule is easier to evaluate than applying a mixture of fertilizer and pesticide. If the soil is moist but not saturated and the pattern resembles deficiency, testing is more informative than guessing. If distinct lesions are spreading between plants, isolate movable containers and seek crop-specific identification from a university extension office or local diagnostic service.
Measure success by what happens next. Healthy new leaves, firmer growth, and no expansion of yellowing suggest the correction is working. Continued spread, blackening roots, stem collapse, or rapid wilting despite suitable moisture suggests the original explanation was incomplete. A severely rotted annual may not recover; removing it can protect limited bed space and allow examination of the root system.
Keep a short garden record with crop, date, weather, watering, treatment, and outcome. It turns future episodes of Diagnosing yellow leaves in a beginner garden into comparisons with known site conditions rather than fresh guesses. The common failure mode is changing several variables at once, which makes improvement impossible to attribute and can introduce new damage.
Frequently Asked Questions
Should I remove yellow leaves from garden plants?
Remove leaves that are fully dead, badly diseased, or blocking inspection, but keep partly functional leaves when the plant has little healthy foliage. Use clean tools and avoid heavy pruning during stress.
Can a yellow leaf become green again?
Some mild chlorosis may improve after its cause is corrected, but badly damaged or aging leaves often remain yellow. Judge recovery by healthy new growth and halted symptom spread.
Do yellow leaves always mean overwatering?
No. Excess water, drought, root damage, nutrient-uptake trouble, pests, disease, weather, and normal aging can look similar. Check moisture below the surface and compare the full symptom pattern.
Should I fertilize a plant as soon as its leaves turn yellow?
Not until drainage, moisture, recent weather, and leaf age have been assessed. Fertilizer may worsen salt stress and cannot correct oxygen-starved or diseased roots.
When should I seek help identifying yellow leaves?
Seek crop-specific help when symptoms spread quickly, include distinctive lesions or stem collapse, affect valuable plants, or continue after basic moisture problems are corrected. Clear photographs and a timeline improve identification.
Further Reading
Authoritative Sources
- Diagnosing Problems in the Garden
extension.umn.eduThe University of Minnesota Extension explains how plant patterns, site conditions, and symptom progression support a more reliable garden diagnosis
- Soil Testing
extension.psu.eduPenn State Extension provides practical information about collecting soil samples and using test results instead of guessing at nutrient problems
- UC IPM Home, Garden, Turf, and Landscape Pests
ipm.ucanr.eduThe University of California's pest management resource offers crop-specific symptom and pest information for checking yellow leaves against likely biological causes
- Integrated Pest Management Principles
epa.govThe U.S. Environmental Protection Agency outlines monitoring and targeted response principles that help gardeners avoid unnecessary pesticide use
Conclusion
Yellow foliage is a symptom to investigate, not a fertilizer instruction. Preserve the evidence by noting which leaves changed first, how the pattern is distributed, and what happened in the garden before it appeared. Then check root-zone moisture and drainage, inspect for pests or lesions, and consider nutrient testing only after access problems have been ruled out.
Make one low-risk correction at a time and track the response. New foliage should emerge with better color and normal firmness if the suspected cause has been addressed; old leaves may never recover. Escalate to a local extension office or plant diagnostic service when damage spreads rapidly, stems collapse, roots rot, or a distinctive disease pattern appears. That measured process protects stressed plants from unnecessary watering, feeding, and spraying while building a useful record of how the specific garden behaves.