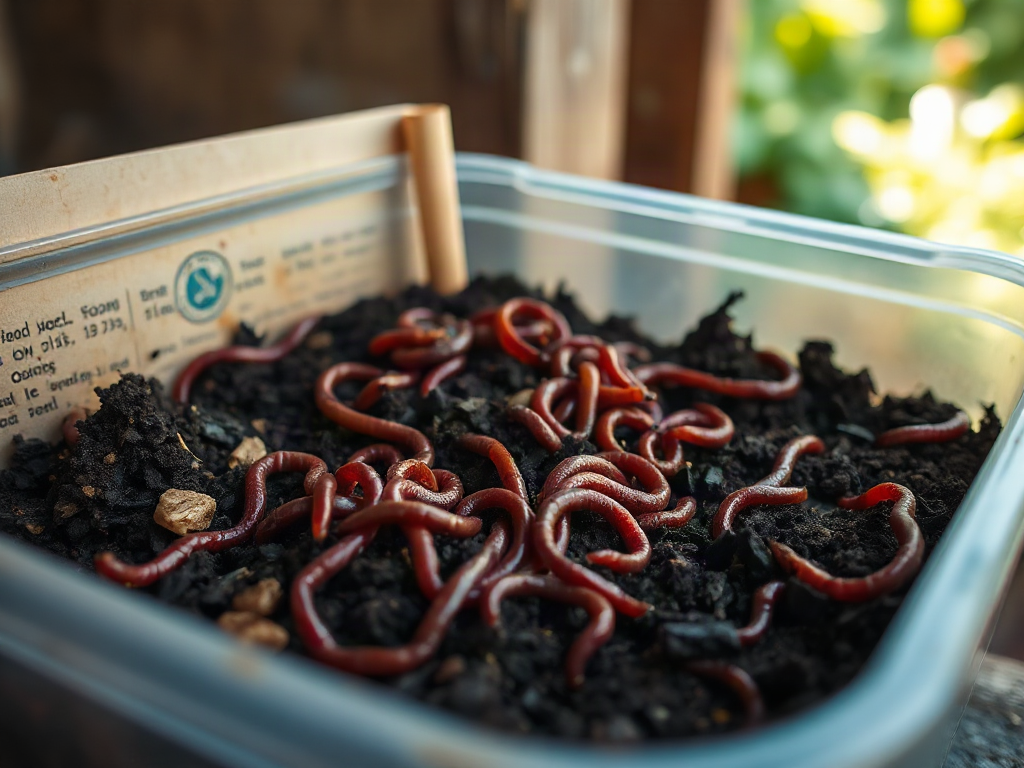
Worm farming for beginners using household compost works best in a ventilated, shaded bin filled with damp bedding, composting worms, and small portions of suitable kitchen scraps. Use red wigglers rather than ordinary garden earthworms, keep the bedding as moist as a wrung-out sponge, and bury chopped plant scraps beneath the surface. Add food only after earlier portions begin disappearing, because excess scraps create acidic, airless conditions that attract flies and produce odors. A healthy worm bin smells earthy, contains recognizable moist bedding, and gradually converts food waste into dark castings without becoming hot, soggy, or compacted.
Choose a Bin, Worm Species, and Location
A beginner worm farm needs a shallow, breathable container rather than a deep pile of household waste. Composting worms live near the surface of rich organic material, where food, moisture, and oxygen meet. An opaque plastic tote with a secure lid is inexpensive and easy to manage, while a purpose-built stacking system can make harvesting more convenient. Either option can work if air can enter, excess liquid cannot accumulate, and light is excluded.
Red wigglers are the usual choice because they feed actively in decomposing bedding and tolerate the crowded conditions of a managed bin. Garden earthworms are adapted to mineral soil and deeper burrows, so moving worms from a lawn into a tote usually produces disappointing results. Purchase composting worms from a reputable local or mail-order supplier, and confirm the species rather than relying on a package labeled only as “bait worms.”
Bin size should follow the amount of food actually generated, not an ambitious estimate of future composting. A modest tote is easier to regulate than an oversized container filled with fresh scraps. Broad surface area is more useful than exceptional depth because feeding and gas exchange occur mainly in the upper layers. Drill or provide small ventilation openings where they will not allow bedding to spill, and cover larger openings with fine screen if flies are persistent.
Place the farm where temperatures remain moderate and direct sun cannot heat the container. A basement, insulated garage, utility area, or shaded outdoor position may work, depending on local weather. Outdoor bins face sharper temperature swings and greater risk from heavy rain. Indoor bins offer more stable conditions, but poor feeding practices become noticeable quickly through odors or insects. The best location is one you can inspect regularly without exposing the worms to heat, freezing, or standing water.
Drainage taps are sometimes marketed as a necessity, but a well-managed bin should not continuously produce liquid. Fluid collecting at the bottom usually indicates excessive moisture, inadequate bedding, or too much watery food. Preventing that imbalance is better than routinely draining it. Set the container on a washable surface during the first few weeks, and keep a tray beneath it if leakage is possible. For a focused setup reference, keep this worm farming plan for household compost available while assembling the bin.
Build Moist Bedding Before Adding Food
Bedding is both the worms’ habitat and a carbon-rich counterweight to wet, nitrogen-rich kitchen scraps. Shredded corrugated cardboard, torn plain paper, aged leaves, and partially finished compost can be combined to create a loose matrix. Glossy paper, heavily coated packaging, and materials contaminated with cleaners or oils do not belong in the bin. Remove plastic tape and labels from cardboard before shredding it.
Moisten bedding in a separate bucket or tub, then squeeze out excess water before placing it in the worm farm. The material should feel evenly damp but should not release a stream when compressed. This simple test is more useful than following a fixed volume of water because cardboard, leaves, room humidity, and food scraps all hold different amounts. Fluff the mixture so air pockets remain, and fill much of the container without pressing it down.
A small amount of mature compost or ordinary garden soil can introduce grit and microorganisms, but it should not replace bedding. Worms have a muscular gizzard and use fine mineral particles while processing food. Avoid adding large quantities of soil, which makes the bin heavy, dense, and harder to aerate. Likewise, do not start with fresh manure or a large mass of unfinished hot compost; active heating can make a closed bin unsafe for worms.
Add the worms to the prepared habitat and leave the lid off under a light for a short settling period if they are gathering near the surface. Composting worms naturally move away from light and into bedding. Persistent escape attempts after settling deserve investigation rather than a tighter lid: saturated bedding, extreme acidity, heat, or chemical residue may be making the habitat unsuitable.
For the first feeding, bury a small pocket of chopped scraps beneath several inches of bedding. Covering food reduces exposure to fruit flies and keeps the active decomposition zone moist. Place the next feeding in a different area so you can compare how quickly each pocket is consumed. A beginner may assume that adding more food accelerates compost production, but the worm population and associated microbes need time to adjust. The safer approach is to begin below the bin’s apparent capacity and increase portions only when previous food is mostly unrecognizable.
Keep spare damp cardboard nearby. It is the most useful correction for a bin that becomes wet, compacted, or food-heavy. This bedding-first approach is central to worm farming for beginners using household compost because it creates a buffer against common feeding errors.
Feed Household Scraps Without Overloading the Bin
Suitable worm food consists mainly of plant-based kitchen residues offered in manageable pieces. Vegetable trimmings, fruit peels, melon rind, coffee grounds in moderation, loose tea leaves, crushed eggshell, and small amounts of plain cooked grains can be used. Chopping or freezing and thawing tougher scraps breaks cell structure and makes them easier for microbes to colonize. Worms consume softened, microbially active material more readily than a newly added carrot end or thick squash rind.
Feed according to disappearance, not a rigid calendar. Pull back the bedding and inspect the last feeding pocket. If it contains mostly softened fragments and active worms, add another modest portion nearby. If intact scraps remain slimy or smell sour, stop feeding and add dry shredded cardboard. This pause does not deprive healthy worms; it allows the existing organic matter to stabilize.
A compact feeding checklist keeps the inputs predictable:
- Use regularly: chopped vegetable scraps, most fruit scraps, coffee grounds mixed with bedding, and crushed eggshell.
- Use sparingly: citrus, onion, spicy foods, bread, rice, and very wet fruit.
- Leave out: meat, fish, dairy products, grease, oily meals, pet waste, and packaging labeled compostable unless it is specifically suitable for home vermicomposting.
The distinction is partly about nuisance control. Meat, dairy, and oily leftovers decompose in ways that readily create odors and attract pests in a small household system. Bread and cooked starches are not automatically toxic, but large portions can mold, compact, or encourage mites and flies. Citrus and onions may be tolerated in limited amounts, yet a concentrated feeding can push conditions toward acidity. Mixing varied scraps with ample bedding is more forgiving than loading the bin with a single ingredient.
Consider a household that produces a bowl of peels, coffee grounds, and leftovers each day. Emptying the whole bowl into a new bin may bury the worms under more wet material than the system can aerate. A better method is to reserve acceptable scraps in a covered freezer container, add only a small thawed portion, and send the remainder to a municipal compost service or outdoor pile until the worm population grows. A worm farm does not have to accept every scrap to be worthwhile.
Fruit flies are usually introduced on produce or attracted to exposed food. Bury each feeding, maintain a generous dry-looking cover layer of damp cardboard, and avoid leaving scraps against ventilation holes. Freezing fruit waste before use can interrupt insects already present on peels. Do not spray pesticide into the farm; remove exposed food, renew the bedding cover, and use traps outside the container if adults are already in the room.
Monitor the Bin, Harvest Castings, and Correct Problems
A functioning worm farm is judged by smell, texture, worm behavior, and food breakdown rather than by a precise calendar. Healthy contents smell like damp soil or forest litter. Bedding remains moist and springy, worms are distributed through feeding zones, and scraps steadily lose their original form. Finished areas become dark and fine-textured, although pieces of cardboard or eggshell may remain visible.
A foul or rotten odor indicates that oxygen is being displaced by excess food or water. Stop feeding, remove any clearly putrid mass, and fold in handfuls of dry shredded cardboard without aggressively stirring the entire habitat. Check whether ventilation openings are blocked and whether liquid has pooled at the bottom. By contrast, a bin that is dusty, full of crisp bedding, or showing sluggish worms needs water added gradually with a spray bottle or a small amount of moist food.
Worms clustering on the lid or walls can signal a sudden environmental problem, but occasional explorers are not automatically evidence of failure. Check for heat first, then inspect moisture and odor. A large acidic feeding may also trigger movement. Crushed eggshell can contribute grit and modest buffering, but it is not a substitute for removing excess fermenting food. If the bin has become severely sour, transfer the worms into fresh damp bedding rather than trying to conceal the condition with more ingredients.
Harvest when a substantial part of the contents resembles dark, crumbly castings and relatively little original bedding remains. For a simple side-harvest, push finished material to one half of the bin and place fresh bedding and food on the other half. Over time, many worms move toward the new feeding area, allowing castings to be removed with fewer worms. Screening is faster but disturbs the habitat more and may separate fewer cocoons than expected.
Freshly harvested material may contain unfinished scraps, so pick out obvious pieces and return them to the farm. Use castings as a soil amendment or a component of potting mixes rather than assuming that pure castings should replace all soil. Their value lies in stable organic matter and plant-available nutrients, but composition varies with feed and management. Avoid claiming that the dark liquid drained from a soggy bin is “worm tea”; uncontrolled leachate differs from deliberately prepared aerated extracts and may contain compounds from anaerobic decomposition.
Regular inspection prevents dramatic corrections. Check one feeding pocket, the lower bedding, and the smell before adding more waste. The practical troubleshooting sequence is food load, moisture, airflow, and temperature. Changing several variables at once makes it difficult to identify the cause, while one measured correction followed by observation protects the worms and teaches you how your particular bin responds.
Frequently Asked Questions
How often should a beginner feed composting worms?
Inspect the previous feeding rather than following a fixed schedule. Add a small new portion when most earlier scraps have softened or disappeared; pause if recognizable food is accumulating.
Can ordinary earthworms be used in a kitchen-scrap worm bin?
Ordinary soil-dwelling earthworms are poorly suited to crowded, shallow bedding. Use composting species such as red wigglers, which naturally occupy decomposing organic material near the surface.
Why does a worm bin smell bad?
Bad odors usually come from excess food, pooled moisture, or compacted bedding that excludes oxygen. Stop feeding, remove rotten material, add shredded cardboard, and check drainage and ventilation.
Should a worm farm have liquid in the bottom?
A small amount may appear after wet feedings, but regular pooling signals excessive moisture. Add absorbent bedding and reduce watery scraps instead of treating continuous drainage as normal.
Can worm castings be used directly around plants?
Castings can be mixed into garden soil, applied lightly around established plants, or blended into potting media. They are an amendment, not a complete replacement for soil structure and balanced plant care.
Conclusion
A reliable worm farm develops through restrained feeding and close observation rather than constant intervention. Begin with composting worms in abundant damp cardboard, provide ventilation, and choose a location protected from temperature extremes. Bury small portions of suitable plant scraps, then let the condition of the previous feeding determine when more should be added.
Smell and texture provide the earliest warnings. Sour food, pooled liquid, and dense bedding call for a feeding pause and additional carbon-rich material; dry bedding calls for gradual moisture. Once much of the bin has become dark and crumbly, move feeding to one side and harvest the vacated castings. The next practical step is to prepare the habitat before ordering worms, then track each feeding for several weeks so the bin’s actual processing capacity—not the household’s total waste output—sets the routine.