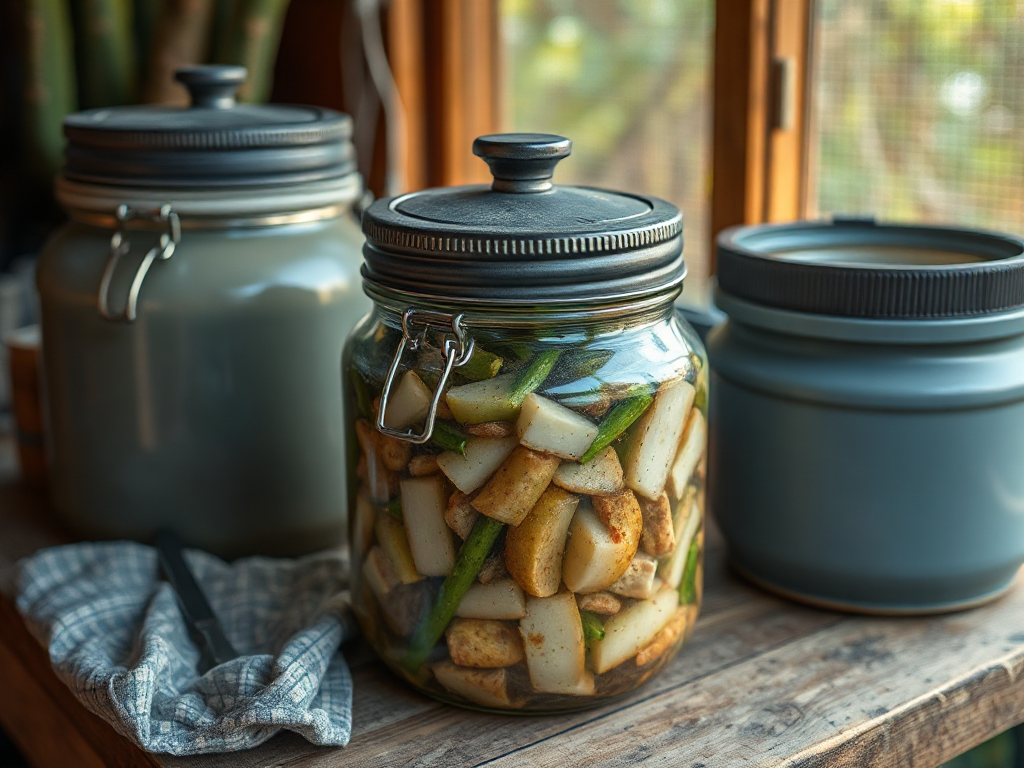
Fermentation temperature control for off-grid food storage depends on holding the active ferment in a steady, food-appropriate range while limiting heat swings, contamination, and unnecessary power use. Insulated boxes, shaded storage, water-bath buffering, and evaporative cooling can moderate conditions when refrigeration is unavailable, but each method has limits in humid weather or during prolonged heat. A stick-on thermometer or probe should track the vessel itself rather than the surrounding room, and readings should be logged during the first few batches. If the ferment becomes excessively warm, develops an unusual odor, or shows surface growth beyond the expected activity, move it to a cooler location and assess its safety rather than relying on appearance alone.
Why Fermentation Temperature Matters Without Grid Power
Temperature controls how quickly microorganisms consume sugars, produce acids, and change the texture of vegetables, dairy, and other fermenting foods. A vessel that warms several degrees during the day may ferment much faster than the same recipe kept in a shaded, insulated location. In an off-grid setting, that daily swing matters because a batch can move from pleasantly active to soft, sharply sour, or difficult to evaluate before the person tending it notices.
Most vegetable ferments are easier to manage when they remain in a moderate, stable indoor range rather than being placed beside a woodstove, in direct sun, or against an exterior wall that freezes at night. Warmer conditions generally accelerate acid production, while cooler conditions slow the process. Neither direction is automatically better: slowing a batch can preserve crunch, but it also extends the period during which the ferment must remain submerged and protected from oxygen.
Off-grid storage adds several practical constraints. A root cellar may provide excellent thermal stability but excessive humidity. A springhouse can stay cool but may expose food to splash, insects, or fluctuating water levels. A solar-powered refrigerator offers precise cooling, yet battery capacity may be better reserved for medicines or fresh foods. The useful question is not whether a method reaches a perfect number; it is whether it keeps the ferment within a predictable zone and gives the operator enough warning when conditions change.
Use the vessel as the measurement target. Air temperature at a shelf can differ from the liquid temperature inside a dense crock, especially after a cool night or a hot afternoon. A probe placed near, but not contaminating, the fermenting environment provides more useful information than a weather reading. The same principle applies when comparing this topic with Fermentation temperature control for off-grid food storage in a larger preservation plan: stability and observation usually matter more than expensive equipment.
Choosing a Temperature Zone for Common Fermented Foods
Different ferments tolerate different temperature patterns, so the food determines the control strategy. Sauerkraut, fermented carrots, beans, and other salted vegetables generally benefit from a cool-to-moderate environment that allows acidification without turning the produce mushy. Yogurt requires a warmer, more deliberate incubation period, while sourdough responds to temperature through changes in rise time, acidity, and dough strength. A single off-grid room may suit one process and be unsuitable for another.
Vegetable ferments are often the simplest place to begin because salt, acidity, and submersion provide several protective controls at once. A small jar of cabbage on a shaded pantry shelf may progress predictably, while a large crock placed in a warm summer kitchen can become active very quickly. The visual signs of bubbling are useful but incomplete. A quiet surface does not prove that fermentation has stopped, and vigorous bubbling does not by itself confirm that the batch is ready or safe.
Temperature should be considered alongside salt concentration, oxygen exposure, vessel size, and timing. A cool batch with weak brine may not behave like a properly salted batch at the same temperature. A tightly packed crock can retain heat generated by microbial activity more effectively than a thin layer in a small jar. For that reason, changing the temperature is not a substitute for following a tested recipe and accurate ingredient measurements.
Match the location to the food
- Salted vegetables: choose a shaded, stable place and inspect brine coverage daily during active fermentation.
- Yogurt: use a controlled warm container or insulated water bath for the incubation period rather than relying on ambient weather.
- Sourdough: adjust the expected rise time when the room cools, and avoid judging readiness by the clock alone.
- Longer storage: move a finished ferment to the coolest consistently clean location available, provided the vessel remains protected from freezing.
A common mistake is treating a cellar, pantry, or buried container as a universal fermentation chamber. Each location has microclimates. Check the shelf at dawn and late afternoon for several days before committing valuable food to it. When the temperature difference is large, an insulated tote or water buffer may provide a better compromise than moving the food outdoors.
Low-Energy Ways to Buffer Heat and Cold
Passive control works by slowing temperature change, not by creating unlimited cooling or heating. A thick-walled crock, insulated cooler, or packed-earth room can delay a hot afternoon from reaching the food. The delay is useful because it smooths the daily cycle, giving the ferment a more consistent environment. It does not remove heat permanently, so an insulated container placed in a hot shed will eventually become hot as well.
Water is an effective thermal buffer because it changes temperature more slowly than air. Placing a sealed fermentation vessel in a larger basin of cool water can reduce short-term swings, provided the outer water cannot enter the food. Replacing that water with cooler water may extend the effect, but it requires clean handling and a dependable source. A water bath is less useful when the surrounding air is already warm and humid or when the vessel cannot be kept sanitary.
Evaporative cooling can help in dry climates. A damp cloth around an outer container, positioned in moving air and shade, may lower the surface temperature as water evaporates. Its performance declines sharply in humid weather, at night, or when air movement is poor. It also introduces a moisture-management problem: wet fabric, standing water, and unclean surfaces can attract insects or transfer contamination around the storage area.
Solar power can be reserved for a small thermostat-controlled cooler, but energy calculations should include the hottest part of the day, battery losses, and the load from opening the unit. A simple insulated box may be more dependable than a weak refrigerator that cycles unpredictably when batteries are low. Conversely, a powered system is preferable for foods that need a narrow temperature range or for finished products held for extended periods.
Practical placement usually follows this order:
- Remove the vessel from direct sunlight, cooking heat, and drafts that cause rapid cooling.
- Measure the chosen location over a full day-night cycle.
- Add insulation or a sealed water buffer if the swing is too wide.
- Use powered cooling only when passive methods cannot maintain an acceptable range.
Do not bury food containers without considering drainage, animals, soil contamination, and retrieval. Ground temperature may be stable, but an improvised underground space can be difficult to clean and inspect. Fermentation temperature control for off-grid food storage is strongest when the location remains observable, washable, and easy to abandon if a batch shows problems.
Monitoring, Adjusting, and Recognizing Failure
A reliable monitoring routine combines temperature records with changes in smell, texture, brine level, and visible activity. Record the vessel temperature at roughly the same times each day during the first several batches. The purpose is not to create a laboratory record; it is to learn whether the storage site warms rapidly, cools overnight, or remains stable enough for the recipe being used.
Place a thermometer where it reflects the food environment. A probe taped to the outside of a jar can show approximate trends, while a sanitized instrument designed for food use can provide a closer reading when the recipe permits opening the vessel. Opening a ferment repeatedly allows oxygen and contaminants into the container, so frequent checking should not become a substitute for good setup. A data logger is convenient but not necessary for most household batches.
Temperature changes should be made gradually when possible. Moving a crock from a hot room into a very cold space may slow activity abruptly and can create condensation on the lid or surrounding surfaces. If a batch is running too warm, first use shade, ventilation, insulation from heat sources, or a cool water buffer. If it is too cool, reduce drafts and use a stable indoor location rather than applying direct heat.
Several warning signs deserve more attention than a single thermometer reading. Vegetables rising above the brine can develop surface yeast or mold because exposed areas contact oxygen. A rotten or putrid odor, unexpected sliminess, unusual colors, or a damaged vessel changes the safety assessment. Scraping the surface is not a universal remedy, particularly when the product has an abnormal odor or the cause is uncertain. When in doubt, discard the batch rather than tasting it to decide whether it is acceptable.
Another failure mode is confusing slower fermentation with failure. A cool batch may show little bubbling while still developing acidity. Give the process time according to a tested recipe, maintain submersion, and evaluate the food using more than surface activity. Conversely, a fast, warm ferment may appear successful after a short period but have a softer texture than intended. The right adjustment depends on the food, ingredients, and storage objective.
Building a Reliable Off-Grid Fermentation Routine
The most dependable system begins with small batches and a known recipe. Small jars require less produce, cool more quickly, and reveal whether the selected storage site behaves as expected. Once the process is predictable, a larger crock may reduce packaging and handling, but it also stores more food in one container and creates a larger loss if temperature or sanitation fails.
Prepare the location before preparing the food. Clean the shelf, verify that the vessel is intact, place the thermometer, and identify a backup position for a heat wave or cold snap. Keep a written note of the recipe, salt amount, packing date, location, and daily readings. That record makes it easier to distinguish a temperature problem from a measurement or ingredient problem in the next batch.
A useful routine has three checkpoints. During setup, confirm that produce is covered by brine and the lid or weight is functioning as intended. During active fermentation, check temperature trends and brine coverage without unnecessary opening. At the transition to storage, decide whether the product should remain where it is, move to a cooler location, or be divided into smaller clean containers. Dividing a batch can improve access and cooling, but each transfer adds handling and contamination opportunities.
Plan for weather rather than reacting to it. A shaded pantry may be adequate in spring but unsuitable during a long hot spell. A cool cellar may become too cold in winter, especially near an exterior door. Insulation slows both warming and cooling, so it can protect against a brief heat spike while also delaying recovery after an unwanted cold event. The tradeoff is useful only when the operator continues to measure conditions.
Prioritize these controls when resources are limited:
- First: accurate ingredients, clean equipment, correct brine, and reliable submersion.
- Next: shade, stable placement, and a thermometer that reveals daily swings.
- Then: insulation, water buffering, or evaporative cooling matched to local climate.
- Last: powered equipment for batches that truly need tighter control.
That order prevents a common weak assumption: expensive temperature equipment cannot correct poor salting, exposed vegetables, or unsafe storage hygiene. The same practical judgment applies when reviewing Fermentation temperature control for off-grid food storage alongside broader preservation plans. A controllable, inspectable batch is more valuable than a large batch maintained in a location nobody can monitor.
Frequently Asked Questions
What is the best off-grid place to ferment vegetables?
A shaded indoor pantry, cellar, or other clean location with limited daily temperature change is usually the easiest choice. Measure the space before using it, because a cellar beside an exterior door may swing more than expected.
Can an insulated cooler replace a refrigerator?
An insulated cooler can slow warming and buffer short-term changes, but it does not provide continuous cooling. Use sealed cool packs or water bottles only when they cannot contaminate the ferment, and monitor the actual vessel.
How often should fermentation temperature be checked?
Check at consistent morning and afternoon times during the first few days and whenever weather changes sharply. Once the location is understood, less frequent checks may be sufficient for a stable batch.
Does warmer fermentation make food safer?
Warmth can speed acid production, but temperature alone does not establish safety. Salt concentration, acidity, clean handling, submersion, recipe method, and storage time all affect the result.
When should a ferment be discarded?
Discard it when it has a rotten odor, unexplained discoloration, abnormal sliminess, a damaged container, or growth that cannot be confidently assessed. Do not taste questionable food as a safety test.
Further Reading
Authoritative Sources
- Academy of Nutrition and Dietetics
eatright.orgProfessional nutrition guidance, healthy eating resources, and practical dietitian-reviewed advice.
- U.S. Department of Agriculture
usda.govOfficial food, nutrition, agriculture, and consumer guidance from the USDA.
- NIH Office of Dietary Supplements
ods.od.nih.govResearch-based fact sheets on nutrients, supplements, dietary intake, and safety considerations.
- International Society of Sports Nutrition
sportsnutritionsociety.orgEvidence-informed sports nutrition resources and position stands for active people and athletes.
Conclusion
Successful fermentation without grid power comes from managing variation rather than chasing a perfect reading. Select a clean, shaded location; measure the vessel environment across day and night; and use insulation, sealed water buffers, or evaporative cooling according to the local climate. Keep vegetable ferments submerged, follow a tested salt-based recipe, and treat temperature records as a way to understand the site rather than as a replacement for sanitation.
Begin with a small batch and a simple log. If the process runs too quickly, reduce heat exposure and improve buffering; if it stalls, remove drafts and allow more time before changing ingredients or equipment. A backup location and clear discard criteria make off-grid food storage safer and easier to manage when weather, power, or water conditions shift.