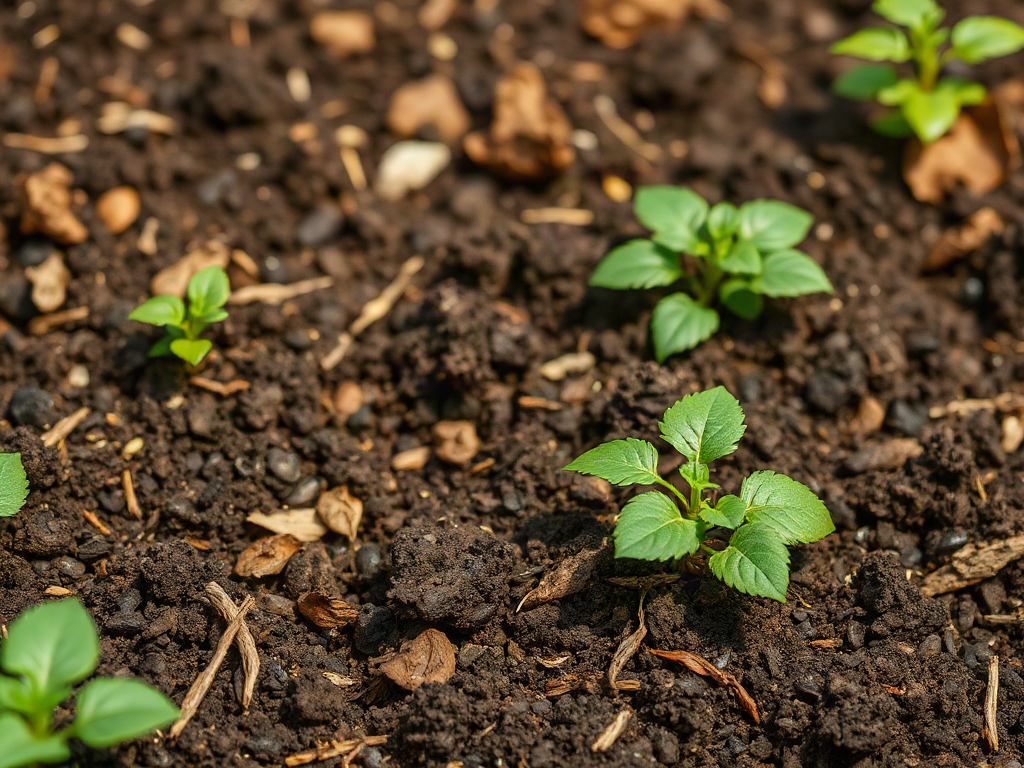
Self-mulching soil for lower-maintenance garden beds is built by keeping the surface covered with plant residues that decompose where they fall, rather than repeatedly exposing or digging the soil. Chopped leaves, fine stems, finished compost, and living groundcovers protect soil aggregates, moderate moisture loss, feed decomposer organisms, and suppress many annual weeds. The layer must remain porous and should stay clear of plant crowns to avoid waterlogged pockets, stem decay, and pest shelter. Renew thin areas as materials settle, and adjust the mixture when residues mat, remain dry, or break down faster than the bed can replace them.
How a Self-Mulching Soil Surface Works
A self-mulching bed functions through continuous surface renewal: plants shed leaves, gardeners return suitable trimmings, and soil organisms gradually incorporate the decaying material. The goal is not to create soil that somehow produces mulch by itself. It is to establish a surface system in which organic residues remain in place long enough to protect the bed and then become part of its upper soil layer.
That surface cover changes several processes at once. It intercepts raindrops that would otherwise break apart exposed aggregates and seal the surface. Shade beneath the residues slows evaporation, while channels left by roots and soil animals provide routes for water to enter. Fungi, bacteria, earthworms, and other decomposers consume the material from below. Their activity turns distinct pieces of leaf and stem into darker, crumbly organic matter near the surface.
The method differs from burying large amounts of undecomposed material. When residues are mixed deeply into soil, decomposers may temporarily compete with nearby roots for available nitrogen, especially if the material is woody or straw-like. Surface placement concentrates most decomposition above the active root zone. Nutrients still become available gradually, but the bed avoids the disruption caused by frequent digging.
A vegetable bed provides a useful example. Lettuce leaves, bean foliage, and non-diseased crop trimmings can be cut into short pieces and left between plants. After harvest, roots remain in the ground while the tops become surface cover. A thin addition of mature compost can fill visible gaps. By comparison, removing every residue and hoeing the bed bare creates repeated work: the surface dries faster, weeds receive light, and rain can compact unprotected soil.
Self-mulching does not mean maintenance-free. Residues shrink as carbon is released during decomposition, and vigorous vegetables may not shed enough material to cover all open ground. Wind can move dry leaves, slugs may gather under dense wet layers, and perennial weeds can push through. The practical objective is fewer disruptive chores—not the complete removal of observation, weeding, or replenishment.
Success is visible when irrigation enters readily, the soil beneath the cover feels cooler and more friable than an exposed path, and annual weed seedlings pull easily from the loose surface. A sour odor, slick residue layer, persistent puddling, or rotting plant crowns signals poor airflow or excessive moisture. Those conditions call for a thinner, coarser cover rather than another load of organic matter.
Choosing Residues That Decompose Without Matting
The most useful self-mulching materials are clean, locally available residues that stay porous after watering. Shredded deciduous leaves are often a strong base because irregular fragments overlap without forming the dense sheet created by whole wet leaves. Chopped herbaceous stems add structure, while finished compost supplies fine organic matter that settles around coarser pieces.
Material choice controls both persistence and nutrient demand. Soft green leaves decompose quickly and may disappear during warm, moist weather. Dry leaves last longer but can blow away until dampened. Fine wood chips persist much longer and suit paths, shrub beds, and spaces around established perennials, although they are less convenient where small seeds must emerge. Grass clippings are rich in moisture and nitrogen, but a thick application can heat, compact, and become slimy.
A mixed layer usually behaves better than a single uniform ingredient. For example, a gardener could combine shredded autumn leaves with small amounts of chopped, seed-free annual stems, then dust exposed spaces with mature compost. The leaves provide coverage, the stems preserve air gaps, and the compost keeps lightweight fragments in contact with the soil. Mixing happens on the surface; deep incorporation is unnecessary.
Some materials should be excluded. Diseased foliage may carry pathogens into the next susceptible crop, while weeds holding mature seed can turn the mulch layer into a seed bank. Bindweed, quackgrass, nutsedge, and other plants capable of regrowing from fragments should not be returned to an active bed unless they have been processed in a way that reliably kills propagating parts. Avoid residues contaminated with persistent herbicides, treated lumber debris, pet waste, and glossy or plastic-coated paper.
The crop also determines what works. Coarse residues are useful around tomatoes, squash, berries, and established herbs because their crowns and stems stand above the surface. Newly sown carrots or lettuce need a narrow strip of fine, uncovered soil so seedlings can emerge. Pulling mulch over a seed row too early may reduce emergence and invite damping-off conditions. Once seedlings are established, cover can be moved closer without touching tender stems.
Material should generally be placed around plants rather than piled against them. Leave breathing room around crowns, woody trunks, and succulent stems. If the layer can be lifted as one wet slab, break it apart and add coarse fragments. If it vanishes rapidly and soil becomes exposed, increase the proportion of slower-decaying leaves or small woody pieces. Readers developing Self-mulching soil for lower-maintenance garden beds should judge residues by airflow, cleanliness, and decomposition rate—not by how thick the bed looks on application day.
Building the Bed in Practical Layers
Bed preparation should preserve existing soil structure while correcting obvious drainage and weed problems. Begin after rain or irrigation when the soil is moist but not sticky. Remove perennial weed crowns and spreading rhizomes rather than hiding them beneath mulch. Loosen only compacted areas that block root growth or infiltration; routine inversion of the entire bed resets the layered habitat the system is meant to build.
Before adding residues, check where water goes. A compacted or poorly graded bed will not drain merely because its surface is covered. If water remains after surrounding soil has drained, address the obstruction, reduce irrigation, or reshape the bed before creating a permanent mulch layer. Conversely, very sandy soil may need mature compost at the surface and more frequent early replenishment because water and organic matter move or disappear quickly.
A practical installation sequence is short:
- Clear persistent weeds: remove roots, runners, and seed heads while leaving sound crop roots in place.
- Correct the surface: fill depressions, relieve localized compaction, and spread a modest layer of finished compost where organic matter is sparse.
- Add mixed residues: apply enough shredded leaves and chopped stems to obscure most bare soil without burying crowns or seed rows.
- Water and inspect: dampen lightweight material, then confirm that water passes through rather than running across it.
- Plant through openings: expose a small patch for transplants or create a clean strip for direct seeding.
Layer thickness should respond to the site rather than a rigid measurement. A thin cover is appropriate around small seedlings and in cool, damp weather. A deeper, airy layer can work between mature summer crops where heat and evaporation are stronger. Adding a heavy blanket all at once may keep cold spring soil wet, conceal vole activity, or restrict airflow near low-growing plants. Several lighter additions are easier to correct.
Consider two beds with the same leaf supply. The first contains established peppers on well-drained soil; it can accept a substantial layer between plants once the soil has warmed. The second holds newly germinated onions in dense soil; it needs narrow uncovered rows and only a light cover between them. Treating both beds identically would ignore crop size, soil texture, and seasonal moisture.
Do not rely on the mulch layer as the sole fertility program for demanding crops. Decomposition recycles nutrients already present in the residues, but harvesting produce exports nutrients from the bed. Compost, crop rotation, soil testing, or carefully chosen amendments may still be needed. The surface system reduces losses and disturbance; it does not create minerals from nothing.
During the first month, look beneath the cover rather than judging its appearance from above. The soil should be evenly moist, not greasy or sour-smelling. Residues should soften while retaining some open spaces. New weeds should be fewer and easier to pull. This early inspection is the best time to thin matted material, cover wind-exposed patches, or widen clear space around vulnerable stems.
Renewal, Troubleshooting, and Seasonal Decisions
Renewal works best when it follows decomposition instead of the calendar. Add material when bare patches begin connecting, rain starts striking exposed soil, or weeds receive enough light to germinate across open areas. If a recognizable layer remains and water still enters freely, topping it up may be unnecessary. Continual overapplication is a common failure because the gardener notices settling but not the dense, wet layer underneath.
Season changes alter the balance. In spring, pull heavy residues back temporarily if the bed is cold and saturated; exposed dark soil warms faster. Return a thinner cover after seedlings emerge and growth accelerates. During hot summer periods, close gaps to shade the surface and reduce moisture swings. In autumn, shred fallen leaves before using them so they are less likely to blow away or seal together. Winter cover can protect soil from rain impact, but wet climates may require coarser material and generous clearance around perennial crowns.
Different symptoms point to different corrections. Slugs or earwigs concentrated near seedlings indicate that dense cover is providing shelter next to tender growth; widen the clear ring and remove decaying material that sits against stems. White fungal threads beneath leaves are often part of normal decomposition when plants remain healthy and the bed smells earthy. Black, slimy layers and a fermented odor indicate oxygen-poor conditions, so lift the material, let the surface breathe, and rebuild more thinly.
Nutrient stress must be separated from normal residue breakdown. Pale leaves on a hungry crop do not automatically prove that surface mulch is stealing nitrogen. Check irrigation, root damage, soil temperature, pH, and the crop’s feeding needs. The risk is greater when large volumes of fine sawdust or other carbon-rich material have been mixed into the root zone. Surface-applied woody material has less immediate contact with crop roots, though fertility still deserves monitoring.
Weeds reveal how well the system is working. Scattered seedlings at planting holes are expected because those areas receive light and disturbance. A flush across the whole bed suggests insufficient coverage, imported weed seed, or material that was recently turned into the soil. Persistent perennial shoots require direct removal; adding more mulch rarely exhausts established rhizomes quickly enough for a productive bed.
Low-input management improves when residues are generated near where they will be used. Plants with abundant, non-diseased foliage, deciduous leaves collected on site, and trimmed groundcovers reduce hauling and storage. Living covers such as low clover may suit orchard edges or widely spaced perennials, but they also consume water and can compete with vegetables. Dead residues are easier to control around annual crops, while living mulch is better reserved for beds where root competition is acceptable.
Keep a simple seasonal note of which material was added, where it matted, and how quickly it disappeared. That record is more useful than copying a universal recipe. A bed that consumes leaves rapidly may need larger or more carbon-rich fragments; one that stays wet needs less material or better drainage. Refining Self-mulching soil for lower-maintenance garden beds means responding to those visible signals rather than maintaining a fixed depth at all costs.
Frequently Asked Questions
Does self-mulching soil eliminate the need to add mulch?
No. Decomposition steadily reduces the surface layer, so most beds need periodic additions of leaves, crop residues, compost, or other clean organic material.
Can grass clippings be used in a self-mulching bed?
Yes, if they are free of herbicide concerns and applied in thin layers. Thick, wet clippings can mat, heat up, smell sour, and block airflow.
Should organic residues be dug into the soil?
Usually not. Surface decomposition protects soil structure and limits the temporary nitrogen competition that can occur when carbon-rich material is buried near roots.
How can seeds be planted through a mulch layer?
Move residues aside to create a narrow strip of exposed, prepared soil. Sow normally, then return a light cover between rows after seedlings are established.
What is the clearest sign that the mulch layer is too wet?
A slick, compacted layer with a sour or fermented odor indicates poor aeration. Remove excess material, loosen what remains, and correct drainage or irrigation.
Conclusion
A durable self-mulching bed comes from matching surface residues to the crop, soil texture, and season. Prioritize clean materials, open structure, reliable drainage, and clear space around stems and crowns. Shredded leaves and chopped garden residues provide adaptable coverage, while compost can fill fine gaps without replacing the need for coarse, airy pieces.
Begin with a moderate layer, observe how water passes through it, and inspect the soil beneath it after irrigation. Add material when connected bare patches appear; remove or loosen it when the surface becomes slimy, sour, or persistently saturated. Keep seed rows open until seedlings establish, and address perennial weeds directly rather than trying to bury them. With those adjustments, renewal becomes an occasional response to visible conditions instead of a recurring cycle of stripping, digging, and rebuilding the bed.