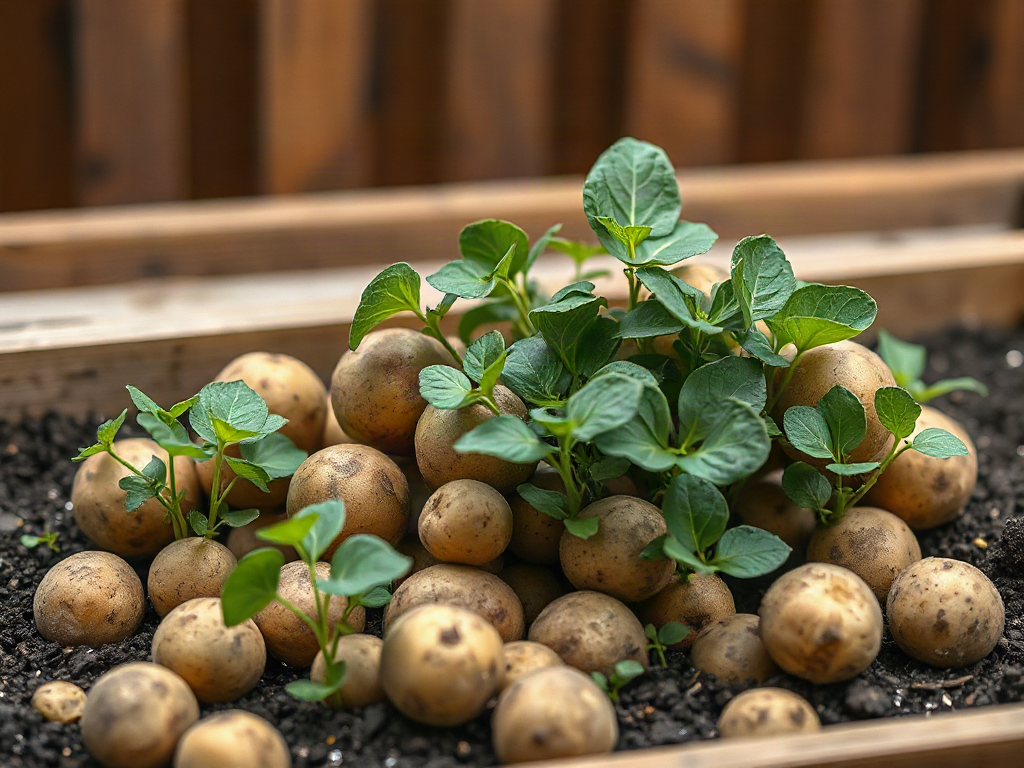
Growing potatoes for beginners in containers or garden rows works best with certified seed potatoes, loose soil, steady moisture, and at least six hours of direct sun. Plant seed pieces about 3 to 4 inches deep, then cover emerging stems with additional soil or organic material so developing tubers remain dark. Containers offer easier harvesting and soil control but dry quickly, while garden rows provide steadier moisture and more root space. Avoid waterlogged soil, fresh manure, and prolonged light exposure, which can cause rot, excessive foliage, or green tubers.
Should You Grow Potatoes in Containers or Garden Rows?
Containers are useful where ground soil is compacted, poorly drained, or unavailable, while rows are usually easier to manage when ample garden space and workable soil already exist. Both systems can produce a worthwhile crop. The better choice depends less on promised yield and more on drainage, watering capacity, available sunlight, and how much soil the gardener can prepare.
A potato plant forms its harvest underground on short stems called stolons. Those developing tubers need loose soil, oxygen, moisture, and protection from light. A garden row offers a broad, relatively stable root zone, so it is more forgiving during hot weather. It also makes hilling several plants at once straightforward. The tradeoff is the physical work of loosening soil, controlling weeds, and digging carefully at harvest.
A container gives the gardener control over the growing medium and makes harvesting possible without excavating a bed. Choose a sturdy pot, grow bag, or food-safe container with drainage holes and room for at least 10 to 15 gallons of mix. A wide container is generally more useful than an extremely tall, narrow one because plants need horizontal root room as well as depth. Two or three seed pieces are enough for many containers in this size range; crowding produces competing stems and often smaller tubers.
| Decision factor | Container | Garden row |
|---|---|---|
| Water management | Drains and dries quickly | Usually retains moisture longer |
| Soil control | Easy to fill with a loose mix | Depends on existing ground |
| Harvest | Tip out or empty gradually | Lift with a fork or hands |
| Space | Fits patios and small yards | Better for a larger planting |
| Main risk | Heat and missed watering | Compaction and poor drainage |
Do not assume that adding soil to a very tall tower will force potatoes to form along the entire buried stem. Some varieties respond better to repeated covering than others, and excessive depth can leave the lower root zone cold, wet, or oxygen-starved. Beginners usually get more predictable results from a moderate container filled in stages or a conventional row with a broad hill. Whichever method you choose, set it where the foliage will receive at least six hours of direct sunlight and where watering is convenient.
Seed Potatoes, Soil, and Sun: What to Prepare
Certified seed potatoes are the soundest starting material because they are produced for planting and inspected under seed-production standards. Grocery potatoes may be treated to delay sprouting, may carry disease, or may be a variety poorly suited to the local season. Select firm seed potatoes with visible eyes and reject pieces that are soft, badly shriveled, or decaying.
Small seed potatoes can go into the soil whole. Larger ones may be cut into pieces, with each piece retaining at least one strong eye and enough stored tissue to support early growth. Pieces roughly the size of a small egg are practical, but exact dimensions matter less than healthy eyes and sound flesh. Use a clean knife, and allow cut surfaces to dry in a ventilated, shaded place until they feel dry rather than freshly wet. Planting immediately into cold, saturated soil increases the chance that a cut piece will rot before shoots establish.
Potatoes favor loose, well-drained soil that holds moisture without remaining soggy. In a row, loosen the bed deeply enough that roots and tubers will not meet a hard layer just below the planting trench. Incorporate finished compost if the soil needs organic matter, but avoid fresh manure. Fresh manure can push leafy growth, introduce weed seeds, and contribute to irregular tuber quality. Heavy clay is not corrected by placing a pocket of fluffy mix inside an otherwise waterlogged bed; water may collect in that pocket. A raised bed or container is the safer choice when drainage cannot be corrected across the site.
For containers, use a quality potting mix rather than soil dug directly from the yard. Garden soil compacts in pots, reducing the air spaces roots need. A mix containing composted organic material and ingredients that preserve drainage provides a more dependable balance. Confirm that water can escape freely before planting by wetting the filled container and watching the drainage holes.
Variety choice affects timing and kitchen use. Early varieties suit short seasons and gardeners wanting smaller potatoes sooner, while main-season types need more time and can produce a larger storage crop. Purchase varieties recommended for the local climate when possible. A long-season potato planted just before intense summer heat may struggle even if every planting step was correct.
Prepare the site only when the soil is workable rather than sticky or frozen. Potatoes tolerate cool conditions, but seed pieces sitting in saturated ground are vulnerable to decay. A useful check is to squeeze a handful of soil: it should crumble when pressed, not remain a dense, wet lump. Good preparation creates air and drainage; excessive tilling of wet soil does the opposite by forming clods that persist through the season.
How Do You Plant and Hill Potatoes Correctly?
Plant seed pieces about 3 to 4 inches deep with the eyes facing generally upward, then provide room for stems and tubers to expand. In rows, spacing pieces roughly 10 to 12 inches apart is a practical starting point, with enough space between rows to form hills and move around the plants. Closer planting may yield more small potatoes, while wider spacing gives each plant more soil resources and can favor larger tubers.
Begin a container with approximately 4 to 6 inches of damp growing mix over the drainage layer or bottom. Place the seed pieces apart rather than clustering them in the center, then cover them with several inches of mix. Do not fill a tall container to the rim on planting day if you intend to add more material around the stems. Leave enough headroom for later covering while maintaining a usable soil volume beneath the seed.
Hilling means drawing soil or another suitable loose material around the lower stems as the plants grow. Its primary purpose is to keep forming tubers covered and protected from sunlight; it also gives stolons loose material in which to expand. When shoots reach about 6 to 8 inches tall, cover the lower portion while leaving several inches of leafy growth exposed. Repeat as needed until a broad hill has formed or the container is nearly full.
- Plant: Place sound seed pieces in moist, aerated soil and cover them lightly.
- Watch emergence: Check that shoots are upright and the soil is not crusted or saturated.
- Hill in stages: Add soil when stems are tall enough to leave healthy leaves exposed.
- Inspect after rain: Restore any hill that has washed away and cover exposed tubers immediately.
Loose soil, finished compost, or a compatible blend can be used for hilling. Straw may help exclude light and make harvest easier, but it settles, dries quickly, and can leave openings where sunlight reaches the crop. If straw is used, apply enough to remain opaque and check it after wind or heavy rain. Soil provides better anchorage in exposed sites.
A common mistake is burying almost all the foliage each time the plant appears. Leaves manufacture the energy that fills the tubers, so repeated severe burial can slow the plant instead of increasing production. Another error is waiting until tubers are visible at the surface. Green skin indicates light exposure and can be associated with elevated glycoalkaloids; green or bitter potatoes should not be eaten. Prevent exposure by maintaining the hill rather than relying on trimming away green portions after harvest.
After planting, expect emergence to vary with soil temperature, variety, and sprout development. Do not dig repeatedly to check progress because that can damage young shoots. If neighboring plants emerge and one location remains empty well afterward, gently investigate for a rotted seed piece. Replace it only if enough growing season remains for the new plant to mature.
Watering, Feeding, and Troubleshooting the Crop
Consistent moisture becomes especially valuable when plants begin forming and enlarging tubers, but wet soil without air can rot roots and seed pieces. Check moisture below the surface rather than judging by the color of the top layer. Water when the upper soil has begun to dry while the root zone is still slightly moist, applying enough to wet the growing area evenly. Containers may need checks every day during hot or windy weather; rows often need less frequent attention because their larger soil mass changes temperature and moisture more slowly.
Irregular watering can produce misshapen potatoes or growth cracks when dry plants suddenly receive abundant water. The remedy is not constant saturation. Instead, aim for a steady cycle without extreme drying. Mulch between established row plants can reduce evaporation, although mulch must not conceal pest activity or prevent the gardener from checking soil moisture. A saucer holding standing water beneath a container is not a substitute for regular irrigation and may keep the lowest roots waterlogged.
Use fertilizer according to the soil condition and product label rather than assuming more will create more potatoes. Excess nitrogen commonly produces tall, lush tops at the expense of tuber development. In a garden bed, a soil test offers better direction than guessing. Container mixes may contain starter fertilizer, so check the bag before adding another product. Pale lower leaves can reflect depleted nutrients, but they may also result from saturated roots, drought, or natural aging; confirm moisture and drainage before feeding.
Inspect both sides of leaves several times a week. Chewed foliage, clusters of eggs, sticky residue, or rapidly expanding spots deserve attention before damage spreads. Colorado potato beetles and their larvae can remove foliage quickly in areas where they occur. Hand-picking may be adequate for a few plants. Disease-like leaf spots are harder to diagnose from appearance alone because water stress, nutrient problems, and several pathogens can look similar. Remove badly affected material, avoid splashing soil onto foliage, and consult a local extension diagnostic resource when symptoms progress.
Wilting at midday is not automatically a request for more water. Leaves may droop temporarily in intense heat even when the root zone is moist. Check again later in the day and feel the soil before irrigating. Persistent wilt in wet soil points toward root stress or disease rather than drought. Persistent wilt in a light, dry container means the root ball may have become difficult to rewet; apply water slowly in repeated passes so it penetrates instead of running down the sides.
Healthy plants usually show firm stems, expanding green foliage, and gradual canopy growth. Warning signs include a sour smell from the container, soil that stays saturated for days, blackened stem bases, widespread leaf collapse, or exposed green tubers. Correct drainage and moisture problems first because feeding a stressed root system rarely repairs the underlying cause. Rotate potatoes and their close relatives, including tomatoes, peppers, and eggplants, to a different bed in later seasons when space allows; repeatedly using the same soil can preserve crop-specific pests and diseases.
When Are Potatoes Ready to Harvest and Store?
Harvest timing depends on whether you want tender new potatoes or mature tubers with skins suitable for storage. New potatoes can be sampled after flowering begins, although flowering is not a precise maturity test and some varieties flower lightly or not at all. Carefully feel near the outer edge of a hill or container and remove only a few tubers if the plant is to keep growing.
For a mature crop, wait until the foliage yellows and dies back naturally. Reduced top growth signals that the plant is finishing its cycle and the tuber skins are setting. Stop heavy watering as the tops decline so the harvest area is not saturated. If disease has destroyed the foliage, do not assume every tuber is ready or sound; inspect the crop carefully and separate damaged potatoes.
Choose a dry day when possible. In rows, insert a garden fork well outside the hill and lift gradually to avoid spearing the crop. Work inward with your hands after loosening the soil. Containers can be emptied onto a tarp, making it easier to find small potatoes and separate the spent mix. Never pull only on the stems and expect the entire crop to come out attached; tubers detach readily and remain hidden in the soil.
Freshly dug skins can rub off with very little pressure. Handle mature potatoes gently and let surface soil dry before brushing it away. Do not wash potatoes intended for storage because lingering moisture can encourage decay. Set aside cut, bruised, insect-damaged, or green tubers rather than storing them with sound ones. Small fork wounds that seem minor at harvest can become entry points for rot.
Potatoes intended for longer keeping benefit from a short curing period in a dark, ventilated place with moderate conditions. After curing, store sound tubers in darkness with airflow, away from freezing temperatures and sources of heat. Light causes greening, while sealed plastic traps moisture. Check the crop periodically and remove any potato that becomes soft, wet, or moldy before it affects neighboring tubers.
Do not eat green, strongly bitter, or badly sprouted potatoes. Greening itself is chlorophyll, but it signals that the tuber has received light and may have accumulated higher levels of naturally occurring glycoalkaloids. Discard questionable tubers rather than treating deep peeling as a guaranteed correction. Reserve only healthy, disease-free potatoes for future planting, and use certified seed again if the season showed unexplained rot, severe scab, or persistent foliage disease.
Frequently Asked Questions
How many seed potatoes should go in one container?
Use two or three seed pieces in a wide 10- to 15-gallon container. Larger containers can support more, but leave ample space between pieces because crowding usually produces smaller tubers and faster moisture depletion.
Can potatoes grow in partial shade?
They may grow with less sun, but weak light often reduces foliage vigor and the energy available for tuber growth. Choose a location receiving at least six hours of direct sunlight when possible.
Do potatoes need to flower before producing tubers?
No. Tuber formation occurs underground and flowering varies by variety and conditions. Flowers can suggest that new potatoes may be developing, but they are not a dependable maturity test.
Can ordinary garden soil be used in a potato container?
Garden soil alone is usually too dense for a container and can drain poorly. Use potting mix, or a container-appropriate blend that remains loose while retaining enough moisture for steady growth.
Why are my potato plants producing leaves but few potatoes?
Excess nitrogen, crowded planting, insufficient sun, high heat, or harvesting before maturity can favor foliage over tubers. Review fertilizer use, spacing, seasonal timing, and the condition of the root zone.
Conclusion
A dependable first crop comes from matching the growing method to the site rather than chasing maximum depth or planting density. Use containers where soil control and easy harvest matter most, but be prepared to monitor water closely. Choose rows where loose, well-drained ground offers a larger and more stable root zone.
Begin with sound seed potatoes, protect developing tubers from light, and keep moisture steady without leaving roots in saturated soil. Let the foliage power the crop instead of burying it repeatedly or pushing it with excessive nitrogen. As harvest approaches, decide whether you want small fresh potatoes or mature keepers, then handle the tubers according to that goal. A simple planting record noting variety, date, spacing, watering demands, and yield will make the next crop easier to plan.
For region-specific planting dates, suitable varieties, pest identification, and soil-testing guidance, consult a local university Cooperative Extension office or your national agriculture department. Local recommendations are particularly useful because potato disease pressure, seasonal heat, and planting windows differ substantially by climate.