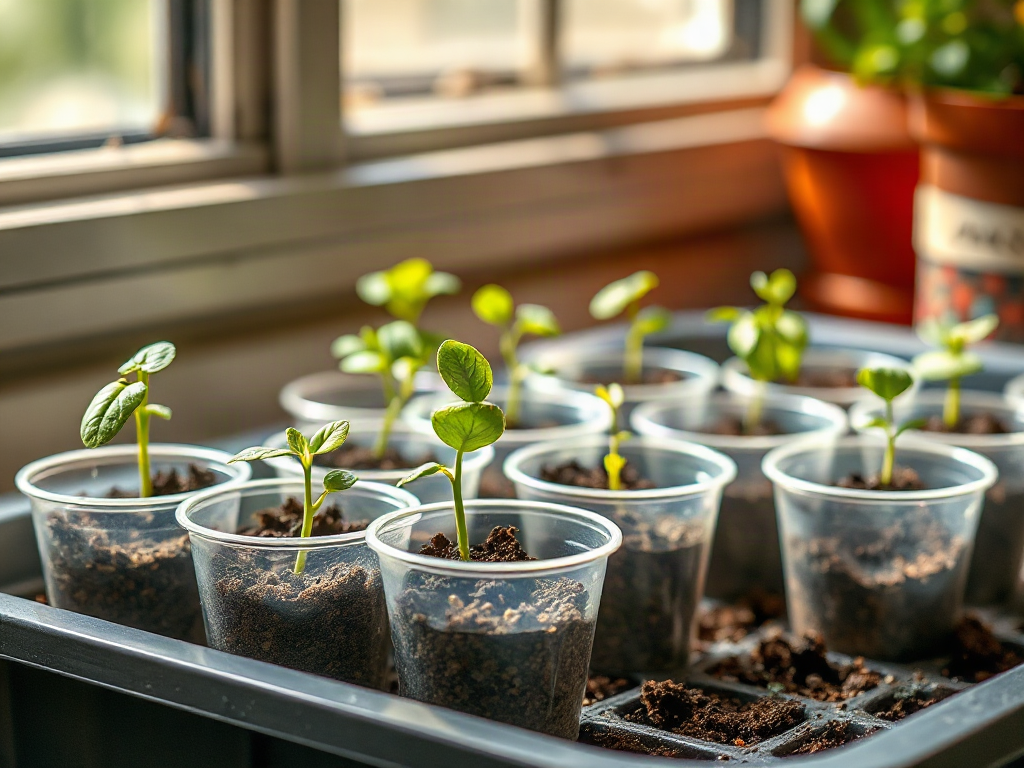
Starting seeds indoors without expensive equipment works with a bright window or basic LED light, clean containers, drainage, a lightweight seed-starting mix, and steady moisture. Use recycled cups or food containers with holes, place them in a warm location, and move seedlings close to a light source as soon as they emerge. Light is usually the limiting factor: a sunny-looking room may still produce thin, leaning stems, while a simple shop light positioned close above the leaves can keep growth compact. Avoid waterlogged soil, overcrowded containers, and early fertilizer, since these commonly cause damping-off or weak roots. The goal is controlled moisture, adequate light, airflow, and gradual outdoor hardening—not a specialized indoor garden.
Build a Seed-Starting Station From Household Materials
A productive indoor seed station needs only four functional elements: a place for containers, a dependable light source, a way to catch water, and enough room to inspect seedlings. A shelf, small table, or sturdy countertop can work. The setup does not need a humidity dome, propagation mat, shelving kit, or decorative planter system to produce healthy starts.
Position the station where temperature stays reasonably stable and where spilled water will not damage flooring or furniture. A shallow baking tray, plastic storage-bin lid, or cafeteria-style food tray can serve as a waterproof base. Set containers inside the tray so watering is contained, but do not allow pots to sit in standing water for long periods. Roots need access to air as well as moisture.
A sunny window can be useful, particularly for herbs and seedlings that will soon move outdoors, but window light has limitations. Glass may create a warm spot during the day while the nearby sill becomes cold at night. Light also arrives from one direction, causing stems to lean. Rotate containers daily if the window is the main source, and keep foliage close to the glass without letting leaves touch a cold pane.
For a darker room, an ordinary LED shop light is often a more practical low-cost upgrade than a specialized horticultural fixture. The fixture should illuminate the entire tray evenly and hang close enough to prevent stretching, while remaining far enough away that leaves do not become hot or bleached. A timer can simplify a regular light schedule, but manually switching the light on and off is workable for a small batch.
The common mistake is buying accessories before solving the limiting condition. A covered propagation kit cannot compensate for insufficient light, and a heat mat is rarely the first priority once seeds have germinated. Spend effort on observing stem length, leaf color, surface moisture, and daily temperature changes. Those signs tell you more than the price of the equipment. For related planning, see Starting seeds indoors without expensive equipment as a useful reference point for matching the setup to available space.
Choose Containers, Growing Medium, and Moisture Control
Containers made from yogurt cups, paper cups, small food tubs, or previously used nursery pots can raise seedlings successfully when they are clean and have drainage holes. Make several holes in the bottom with a heated nail or similar tool, then allow the material to cool before use. A container without drainage is a poor choice because excess water collects around young roots and reduces the air spaces that roots require.
Seed-starting mix should be fine-textured, loose, and able to hold moisture without becoming dense. A commercial seed-starting mix is convenient, but a clean, sifted homemade blend can also work if its ingredients are consistent and free of weed seeds. Garden soil taken directly from a bed is usually too heavy for small containers and may carry organisms that cause problems in crowded, damp conditions. Reusing old potting mix is also less predictable when it has compacted or previously supported diseased plants.
Moisten the medium before sowing so seeds do not shift when water is first applied. Fill containers loosely, press only enough to remove large air pockets, and sow at the depth listed on the seed packet. Very small seeds may need only a light covering, while larger seeds generally tolerate deeper placement. Pressing all mixes firmly is a frequent error; compacted medium can slow emergence and make it difficult for new roots to expand.
Water from below when practical by placing the tray in a small amount of water and removing it once the surface feels evenly damp. Top-watering with a gentle stream also works, especially after sowing, but forceful pouring can expose seeds or create channels. The target is moist—not glossy, muddy, or permanently saturated—medium. Letting the surface dry slightly between waterings can improve airflow, though newly germinating seeds should not be allowed to dry completely.
Recycled containers offer savings but create tradeoffs. Thin plastic may tip, paper can soften, and small cups may dry faster than deeper pots. Label every container with crop and sowing date; mixed trays make it easy to confuse similar seedlings or forget which variety was planted. If a container develops algae, a sour smell, or a persistently wet surface, reduce watering and improve airflow rather than adding more cover.
Give Seedlings Enough Light Without a Grow Tent
Light determines whether indoor seedlings develop sturdy stems or become pale, elongated, and fragile. A plant can remain green near a window while still receiving too little usable light for compact growth. Seedlings that lean sharply toward the glass, show long gaps between leaves, or fall when handled are signaling a light shortage rather than a fertilizer deficiency.
Use the brightest suitable window available, but treat it as an option rather than a guarantee. South-facing exposure may provide more direct light in some homes, while east- or west-facing windows can offer gentler periods of sun. North-facing windows often need supplemental lighting for light-hungry vegetables. Outdoor shade, window orientation, weather, and seasonal day length all change the result, so inspect the plants instead of relying only on the direction of the window.
A basic LED shop light can cover a tray of seedlings at a modest cost. Hang it directly above the foliage and adjust its height as plants grow. The purpose is even coverage, not a bright beam concentrated on one corner. If seedlings at the edges stretch while those in the center remain compact, the fixture is too narrow, too high, or poorly positioned.
Seedlings do not benefit from being illuminated continuously. A consistent day-and-night pattern allows normal development and makes the household routine easier. Use a plug-in timer if remembering the schedule becomes difficult, but a timer is an optional convenience rather than a required piece of equipment. Reflective foil can create glare and uneven hot spots; a pale wall or light-colored background is usually a safer way to improve the surrounding brightness.
Do not try to fix stretched stems by burying every seedling deeply. Some crops tolerate being planted lower during transplanting, but others are sensitive to buried stems. Improve the light immediately, place the fixture closer if appropriate, and thin crowded seedlings. Overcrowding makes each plant compete for light and also slows drying, increasing the risk of disease. The low-cost approach works when light is treated as a primary growing input, not as a decorative addition to the windowsill.
Manage Water, Temperature, Airflow, and Early Growth
Young seedlings grow best when moisture and temperature remain reasonably steady rather than swinging between extremes. A warm room can speed germination for many crops, but warmth also accelerates evaporation and fungal growth when air is stagnant. Once seedlings emerge, airflow and light usually deserve more attention than maintaining a sealed, humid environment.
Remove a humidity cover as soon as most seedlings appear or open it gradually over a short period. Condensation on the lid, fuzzy growth on the mix, or seedlings collapsing at the soil line indicates a wet, poorly ventilated environment. Damping-off can spread quickly in crowded containers, so discard affected seedlings and contaminated medium rather than trying to rescue every plant. Clean containers and fresh medium reduce the chance of repeating the problem.
Use the surface and the container weight to judge watering. A light container with a dry upper layer may need water, while a heavy container with dark, wet medium does not. The correct interval depends on container size, room temperature, light intensity, and plant size. Small recycled cups near a lamp may need checking more often than larger pots on a cool windowsill.
Fertilizer is rarely needed immediately after emergence if the growing medium contains a modest nutrient charge. After seedlings develop their first true leaves, a weak, balanced fertilizer may be appropriate if growth is pale or slow and the medium is low in nutrients. Strong fertilizer does not compensate for poor light; it can damage tender roots and create rapid, weak growth. Prioritize light, drainage, and spacing before feeding.
Thinning is another high-value step that costs nothing. When several seedlings emerge in one cell, keep the strongest plant and cut the others at the surface instead of pulling them up and disturbing its roots. A real-world example is lettuce: a crowded clump may look vigorous at first, but the plants soon become thin and difficult to separate. Giving one seedling room produces a sturdier transplant than trying to preserve every sprout.
- Working setup: leaves remain upright, new growth is compact, and the mix dries gradually between waterings.
- Failing setup: stems stretch, leaves stay wet for long periods, or the soil line turns soft and discolored.
- First adjustment: correct light and watering before adding heat, fertilizer, or extra equipment.
For a second planning reference, compare Starting seeds indoors without expensive equipment with the actual conditions at your growing station, especially its nighttime temperature and available window space.
Harden Seedlings and Decide When to Transplant
Indoor-grown seedlings need a gradual transition before living outdoors. Indoor light is filtered, wind is absent, and temperatures change more slowly than they do on a patio or garden bed. Moving a tender plant directly into full sun can cause leaf scorch, while sudden wind can break soft stems even when the roots are healthy.
Begin hardening when seedlings have a useful root system and outdoor conditions are suitable for the crop. Place them outside in a sheltered, shaded location for a short period, then extend the time over several days while introducing brighter light and more air movement. Bring them in if temperatures drop sharply, strong wind develops, or heavy rain could flatten the containers. The process is not about making plants suffer; it is about allowing leaves, stems, and roots to adjust.
Transplant when the plant is large enough to handle and the root ball holds together, but do not wait until roots circle densely around the container. A tomato may tolerate deeper planting than a pepper or many herbs, whereas a cucumber can resent root disturbance. The seed packet provides useful crop-specific timing, but the plant’s condition matters too. Pale, stretched, or root-bound seedlings may need correction before they are moved outside.
Water containers before transplanting so the root ball does not crumble. Set plants at the appropriate depth, firm the surrounding soil gently, and protect them from intense midday sun for the first period after planting if they appear tender. Recycled containers make the process inexpensive, but remove seedlings carefully from thin cups and avoid tearing roots against rough edges.
Use the next batch to improve the system rather than assuming every failure requires new equipment. Record sowing dates, emergence time, window location, watering frequency, and transplant condition. If stems stretched, sow fewer trays or add a basic light. If roots stayed wet, enlarge drainage holes or use a more open medium. If seedlings dried rapidly, choose deeper containers or group the tray away from a heat source. Small observations turn a makeshift station into a reliable seasonal tool.
For crop-specific sowing dates, transplant timing, and seedling care, consult your state university extension service, local cooperative extension office, or the seed supplier’s instructions. These sources account for regional frost dates and differences among vegetables, herbs, and flowers more accurately than a single universal calendar.
Frequently Asked Questions
Can a sunny window provide enough light for indoor seedlings?
Sometimes, especially for lower-light herbs or seedlings grown during bright seasons. Watch for leaning stems and long gaps between leaves; those signs indicate that a basic LED shop light may be needed.
What household containers work for starting seeds?
Clean yogurt cups, small food tubs, paper cups, and reused nursery pots can work if they are stable and have drainage holes. Place them in a tray to catch water and label each crop.
Should seedlings stay covered after they sprout?
Usually not. Remove or vent the cover after emergence to improve airflow and reduce prolonged surface moisture, which can encourage fungal problems and weak stems.
How often should indoor seedlings be watered?
Check the medium and container weight rather than following a fixed schedule. Water when the upper layer begins to dry and the container feels lighter, but avoid leaving the tray submerged.
When should seedlings move outdoors?
Move them outdoors after they have developed enough leaves and local conditions suit the crop, then harden them gradually over several days. Directly moving indoor seedlings into strong sun or wind can damage them.
Conclusion
A low-cost indoor seed station succeeds through control, not specialized hardware. Give seedlings reliable light, containers that drain, a loose growing medium, measured watering, and enough spacing for air to move between leaves. Recycled containers and an ordinary LED shop light can cover most needs when they are positioned thoughtfully.
Prioritize the conditions that reveal failure earliest: stretched stems point to weak light, wet soil points to drainage or watering trouble, and collapse at the soil line points to excessive moisture and poor airflow. Harden healthy plants gradually before transplanting, and record what happened so the next sowing is more precise. A modest setup can produce sturdy starts when observation guides each adjustment.